Notifications and alerts
Notifications and alerts (shown as Notifications hub in the Control Plane UI) provides a central view of events generated by Gluesync. Use it to monitor system activity, identify warnings or errors, inspect event details, and collect information for troubleshooting.
|
How-to guides
For step-by-step walkthroughs tested on a running Gluesync, see the how-to guides Set up email alerts for platform events, Send platform events to webhooks and Read Gluesync logs and diagnose errors. |
In this guide
You will learn how to open Notifications and alerts, review its columns, find a specific notification, filter the results, and copy error details for further analysis or a support request.
Quick information
Goal |
View, search, filter, and inspect Gluesync system notifications |
Audience |
Gluesync users and administrators |
Level |
Basic |
Time required |
About 5 minutes |
Area |
Control Plane → Notifications hub |
Applies to |
Gluesync 2.3 |
Before you begin
Make sure that:
-
You can sign in to the Gluesync Control Plane;
-
Your account can view system notifications;
-
Gluesync has already generated notifications or system events.
|
Your assigned role and permissions determine which notifications and extended details you can view. If Notifications and alerts or a notification detail is unavailable, ask a Gluesync administrator to verify your access. |
Guide steps
UI
-
Sign in to the Gluesync Control Plane;
-
Select the bell icon in the upper-right corner;
-
Wait for Gluesync to open the complete notification history.

UI
Notifications and alerts displays the available system events in a table. Use these columns to identify the event you need:
| Column | What it shows |
|---|---|
Type |
Info, Warning, Error, or System |
Title |
A brief summary of the event |
Message |
A short description |
Timestamp |
The date and time of the event |
User |
The user or process that triggered the event |
Area |
The affected system area |
Select a column header to sort the notifications. Select the same header again to reverse the sorting direction.
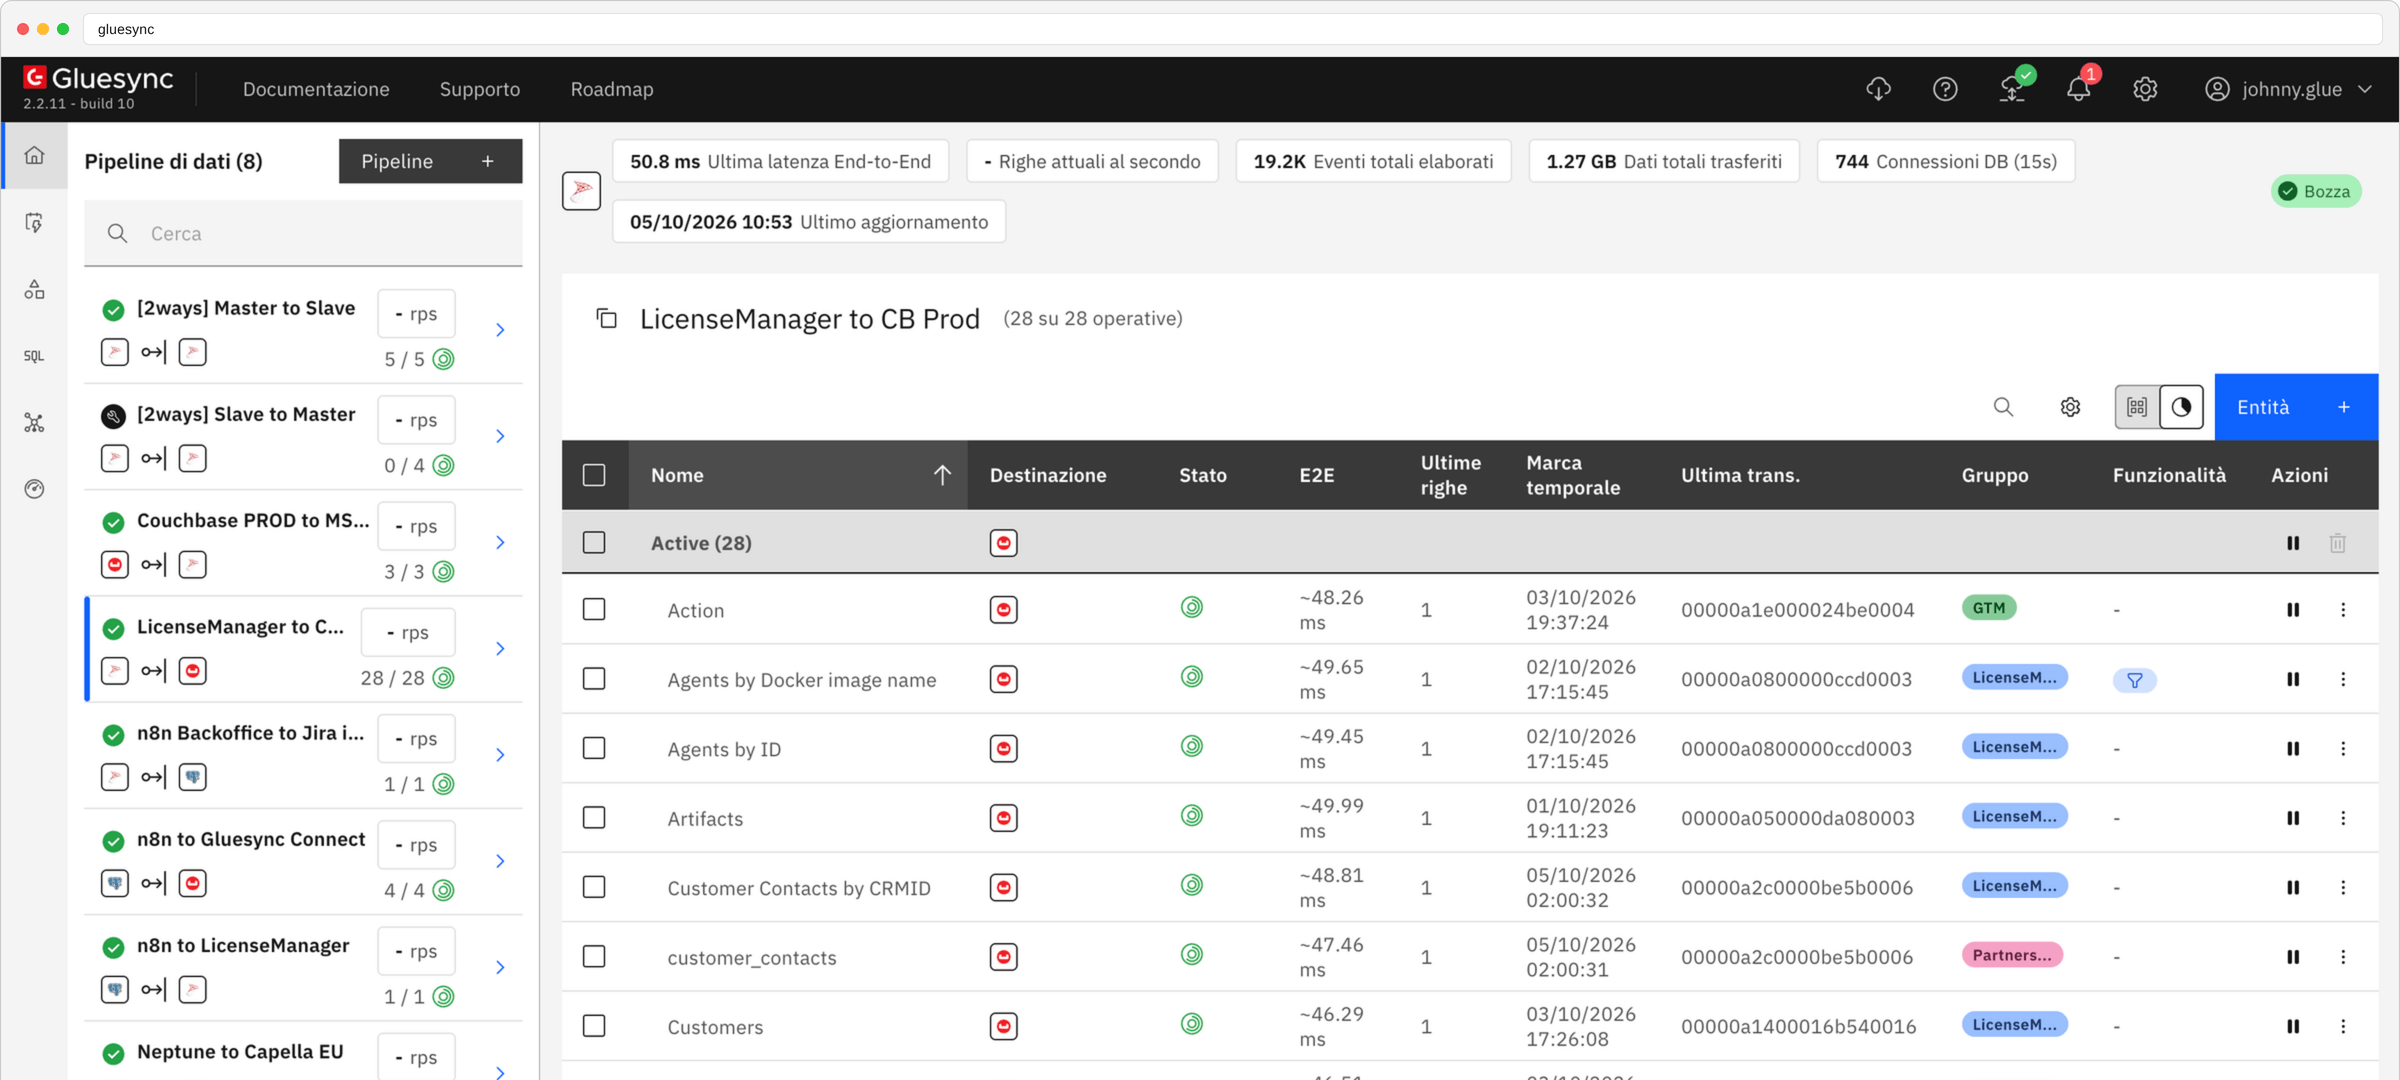
UI
-
Select the magnifying-glass icon in the upper-right area of Notifications and alerts;
-
Enter a word or phrase related to the notification you want to find;
-
Review the notifications matching your search.
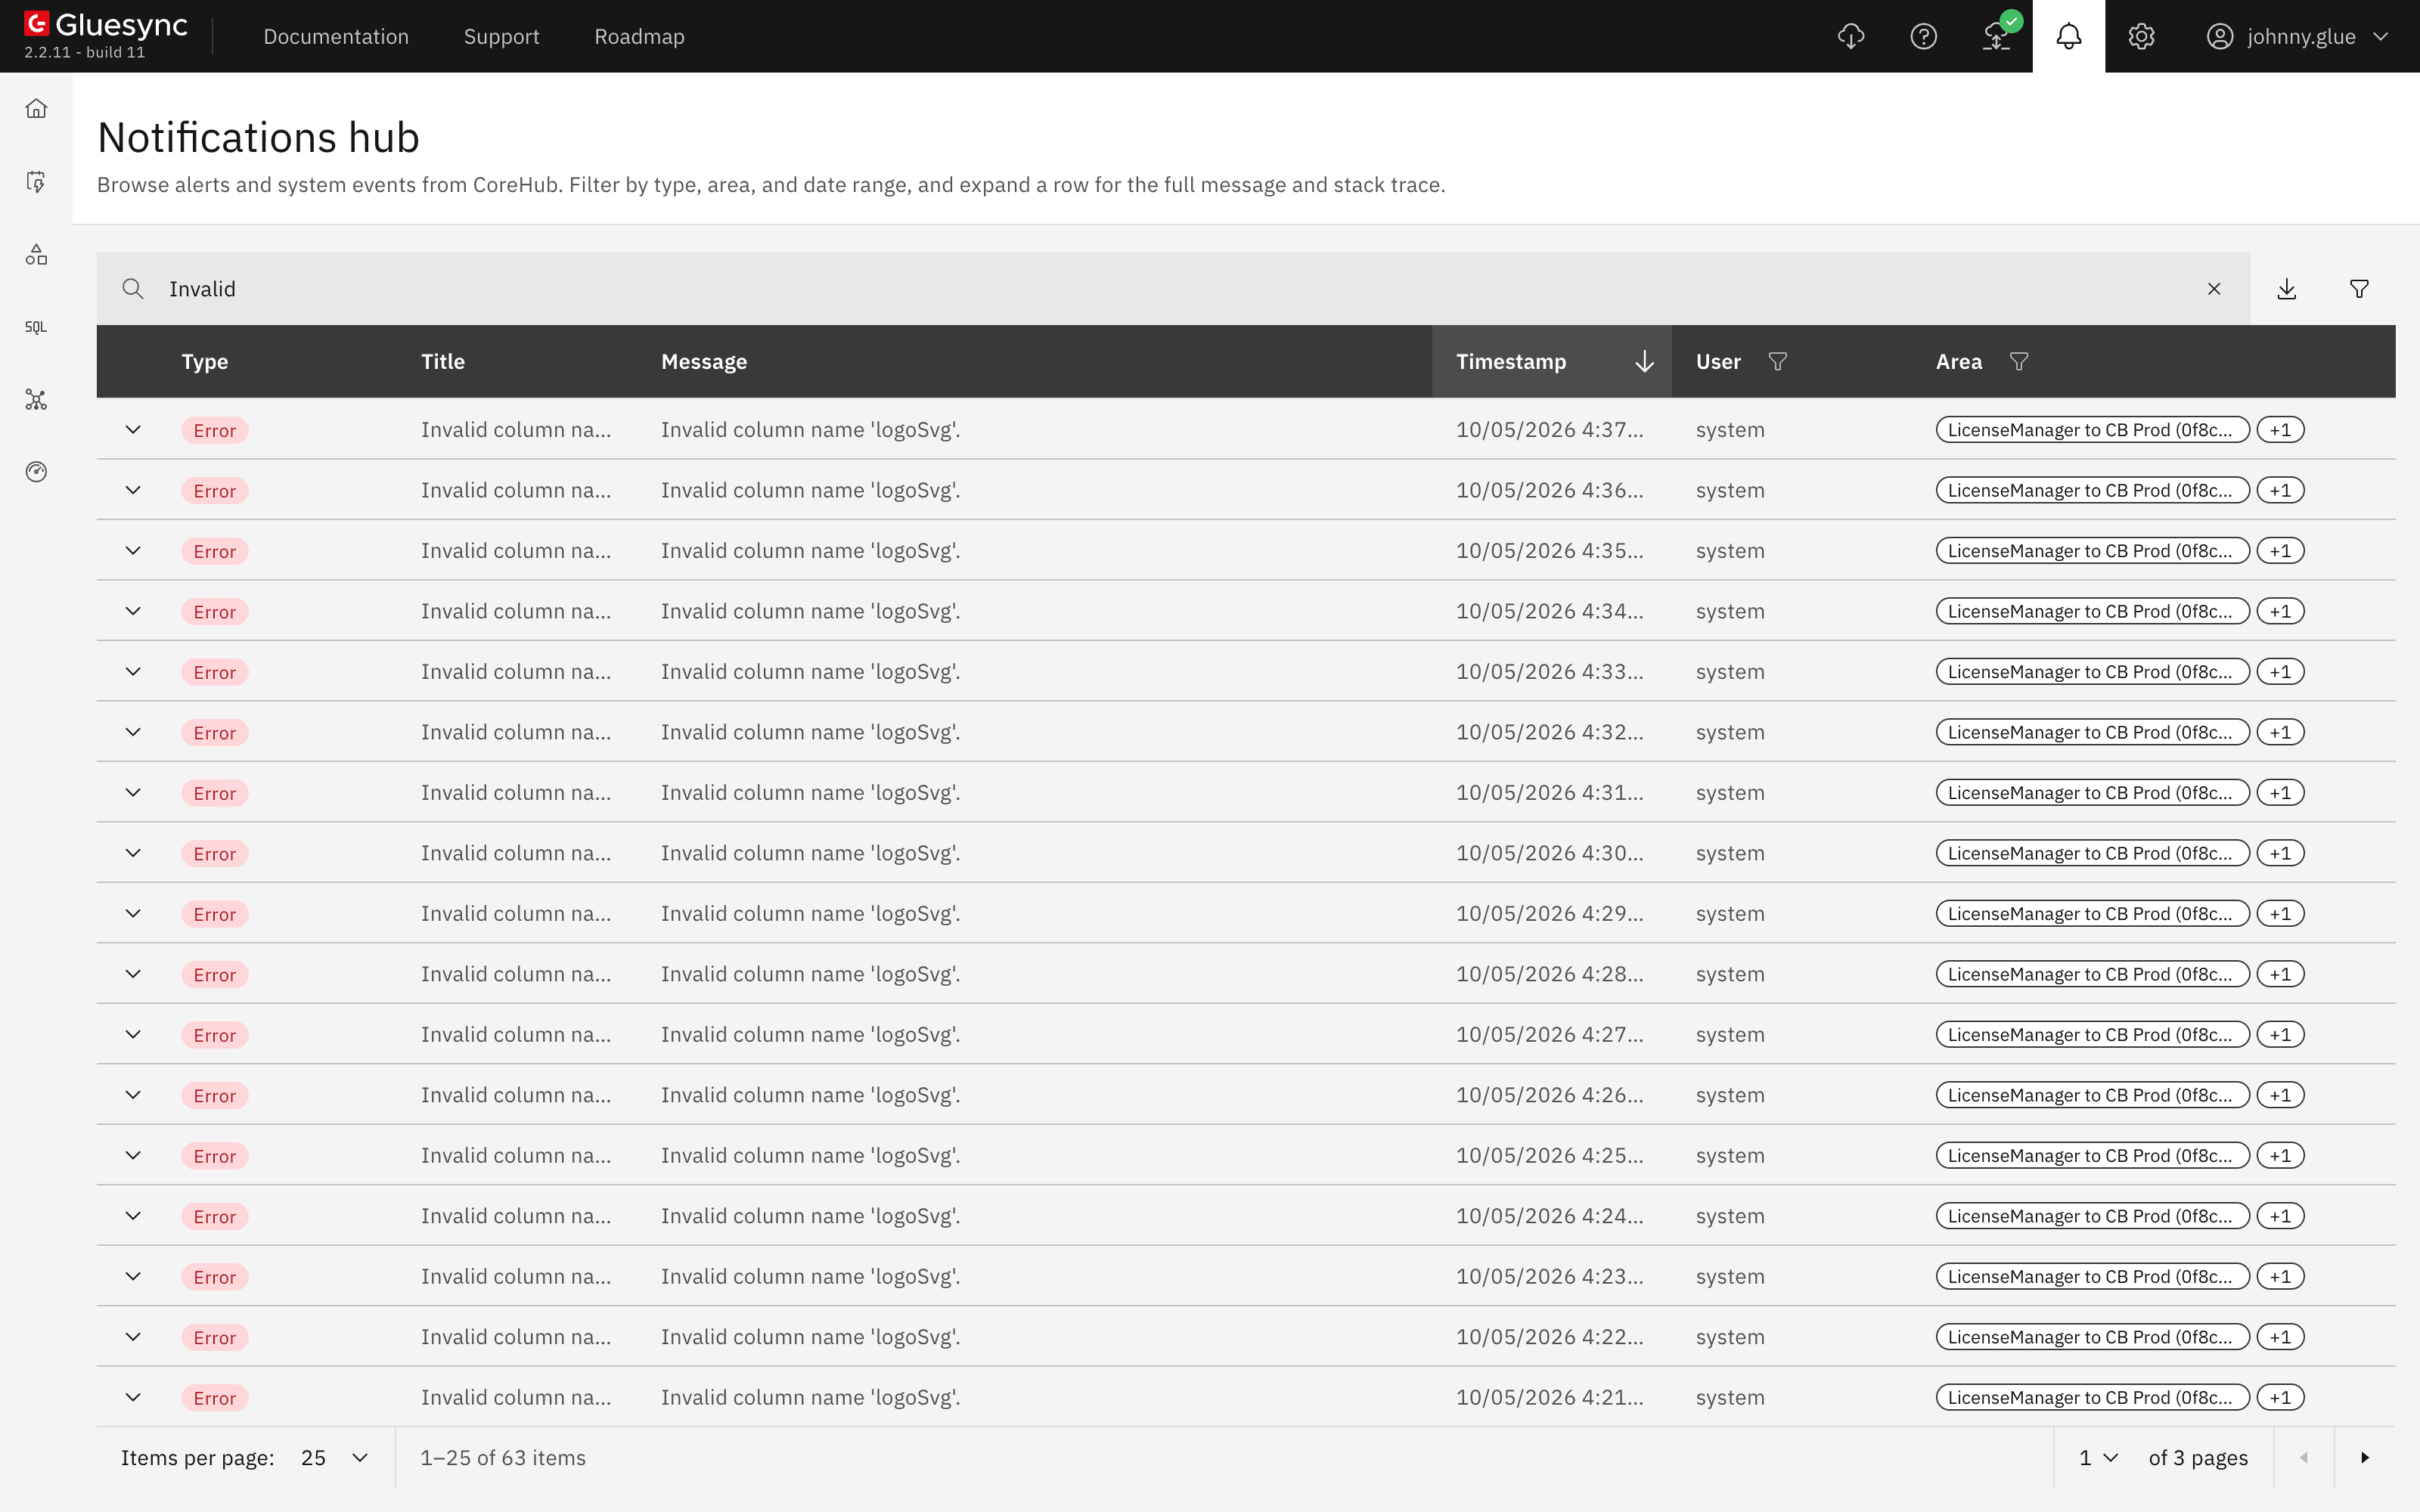
UI
-
Select the filter icon in the upper-right area of Notifications and alerts;
-
Select one or more notification types: Info, Warning, Error, or System;
-
To limit the results to a period, select a start date in From and an end date in To;
-
Select Apply filters.
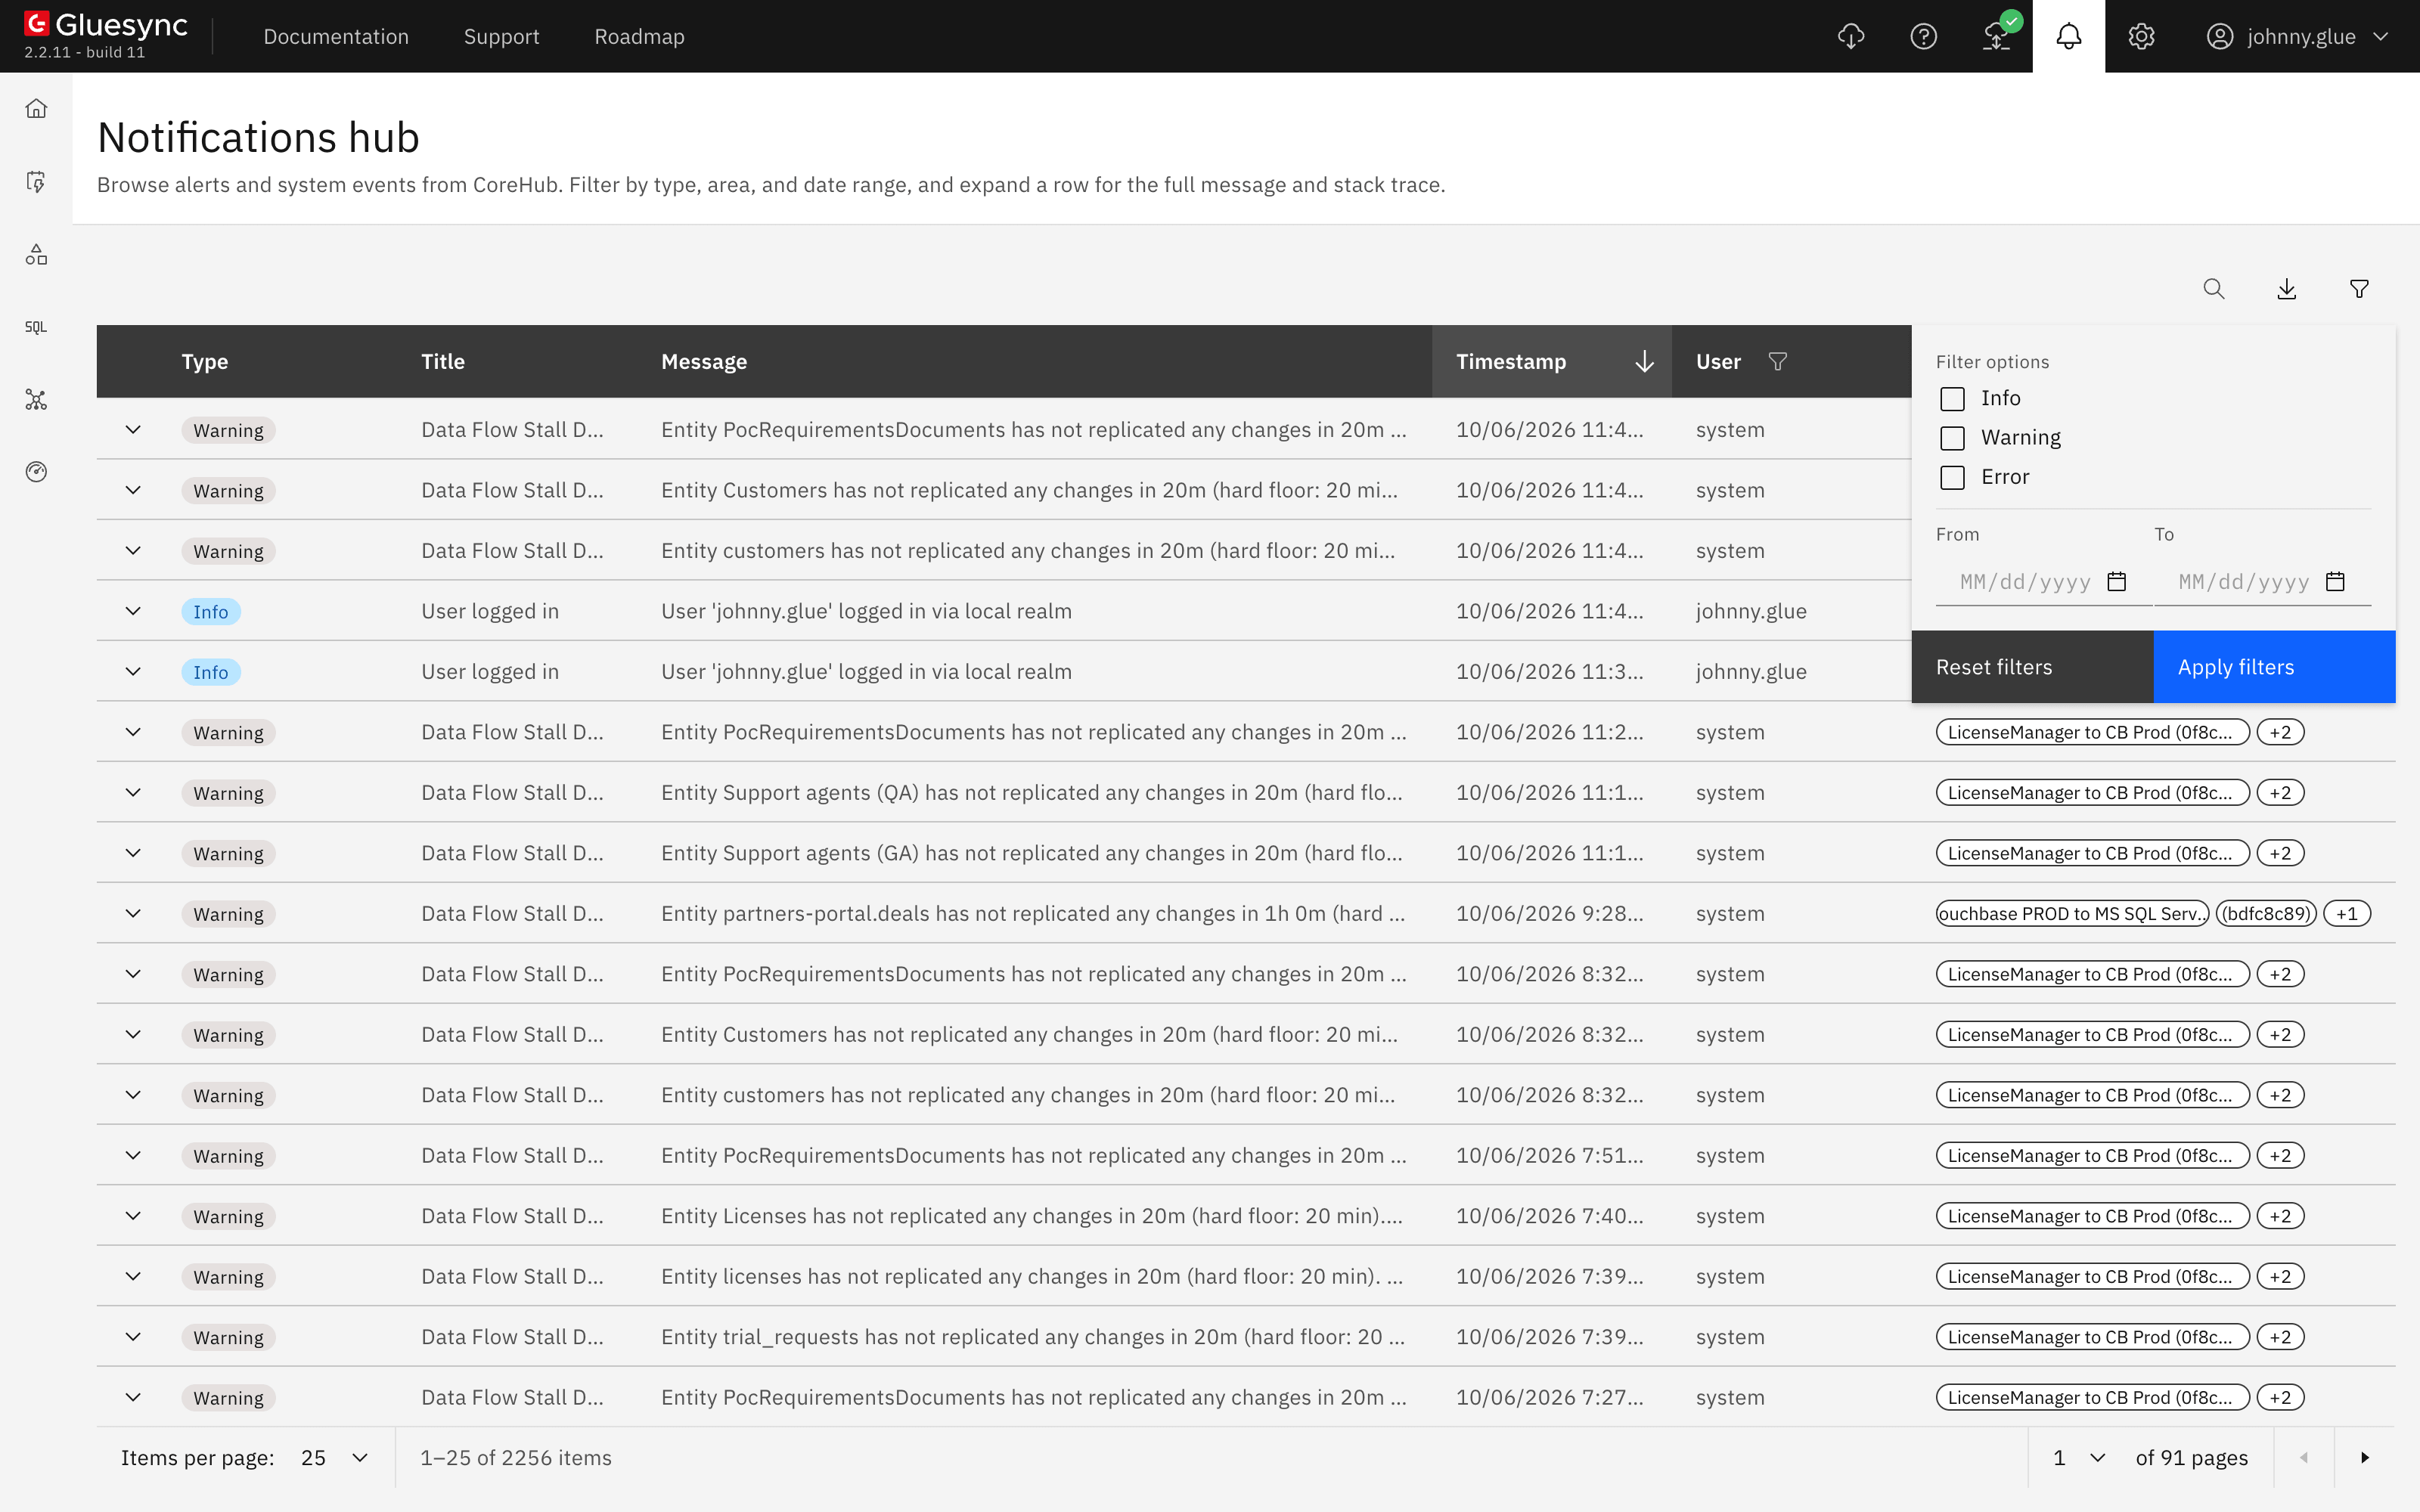
|
To remove the current filters and display the complete notification history, open the filter panel and select Reset filters. |
UI
-
Select the notification you want to inspect;
-
Review the complete message and any available code or error details in the expanded row;
-
Select Copy;
-
Paste the copied details into your troubleshooting notes or support request.
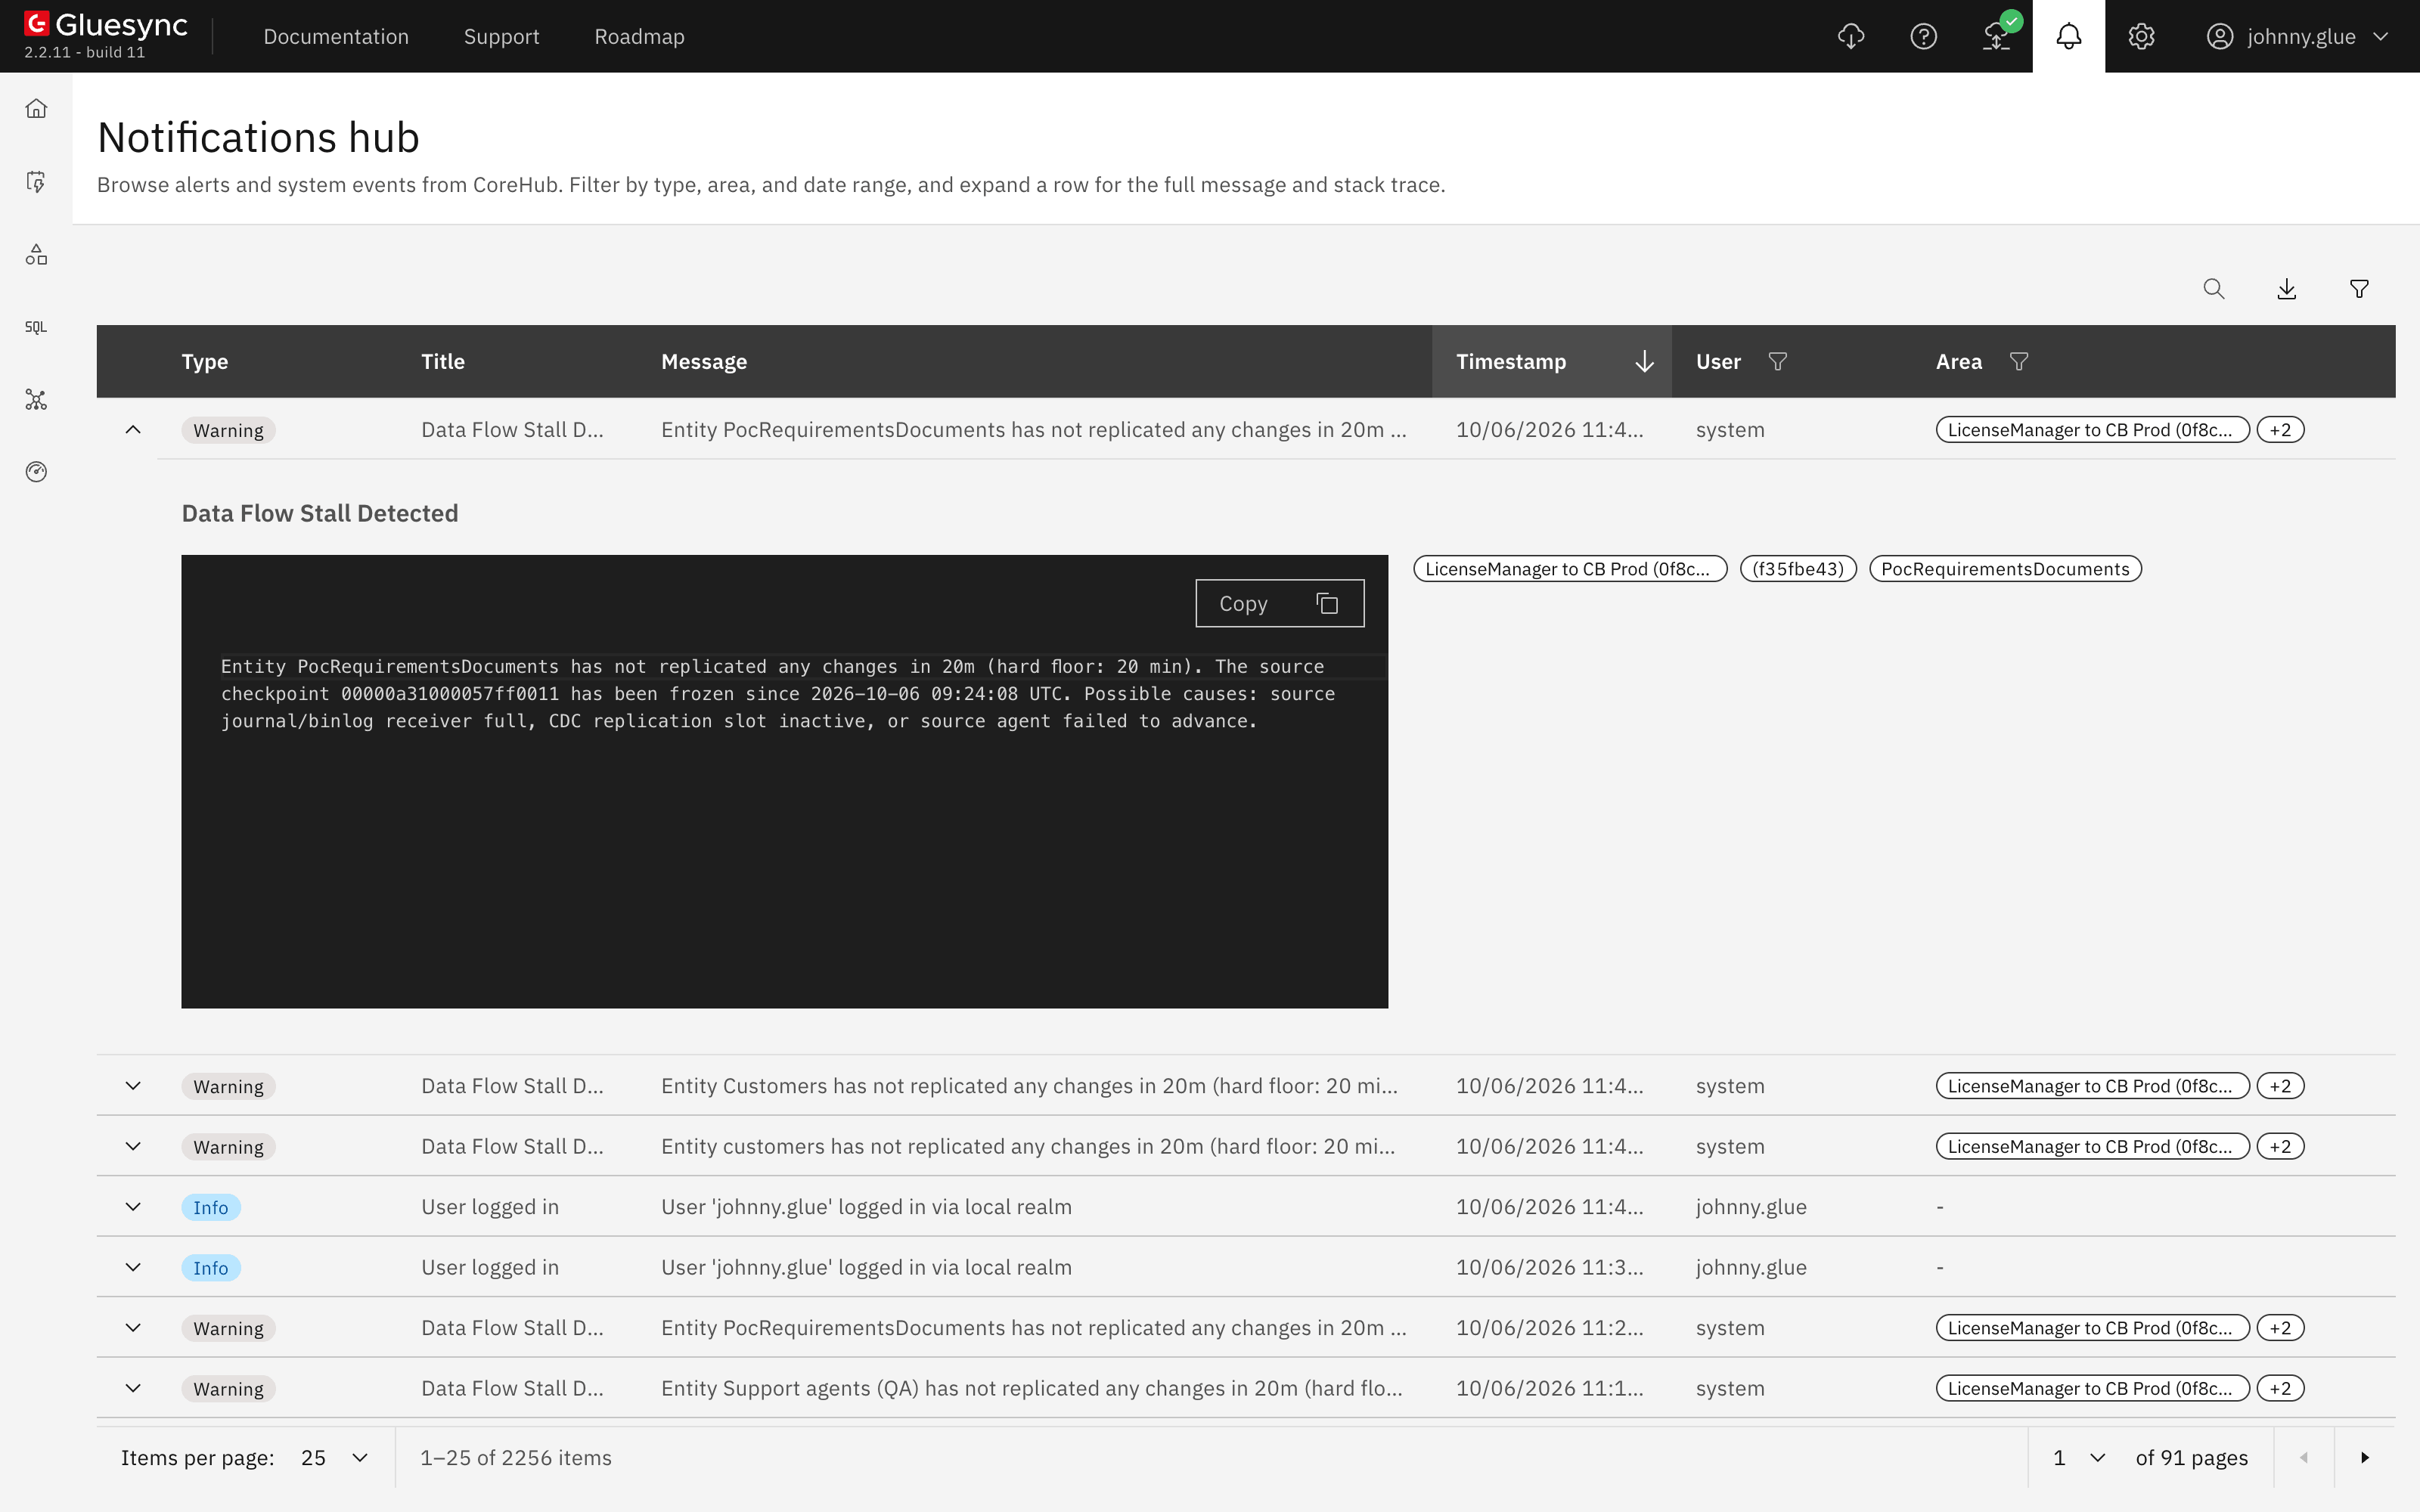
|
When requesting support, include the complete error message, timestamp, notification area, and any available code. This helps the support team identify the event more quickly. |
Understand notification types
| Type | Meaning | Recommended action |
|---|---|---|
|
Reports system activity or a status update. |
Review the message. No immediate action is usually required. |
|
Identifies a condition that may require attention. |
Check the details and monitor the affected Gluesync area. |
|
Reports a failed operation or system issue. |
Inspect the complete details and begin troubleshooting. |
|
Reports platform-level or infrastructure activity from Gluesync. |
Review the message for operational context. Escalate if availability is affected. |


Troubleshooting
| Problem | Possible cause | What to do |
|---|---|---|
The expected notification is not displayed |
Active filters exclude the event |
Select Reset filters and search again |
No notifications are shown for the selected period |
The date range does not include the event |
Check the From and To dates |
The search returns no results |
The search text does not match the notification content |
Use a shorter term or search by another event detail |
The complete message is not visible |
The notification row is collapsed |
Select the row to expand its details |
The notification history is incomplete |
Older notifications may have exceeded the configured retention period |
Ask a Gluesync administrator to verify the notification retention settings |
Configure notification retention
Administrators can control how long Core Hub stores notifications. In the Control Plane, go to Settings → Notification and set the retention period.
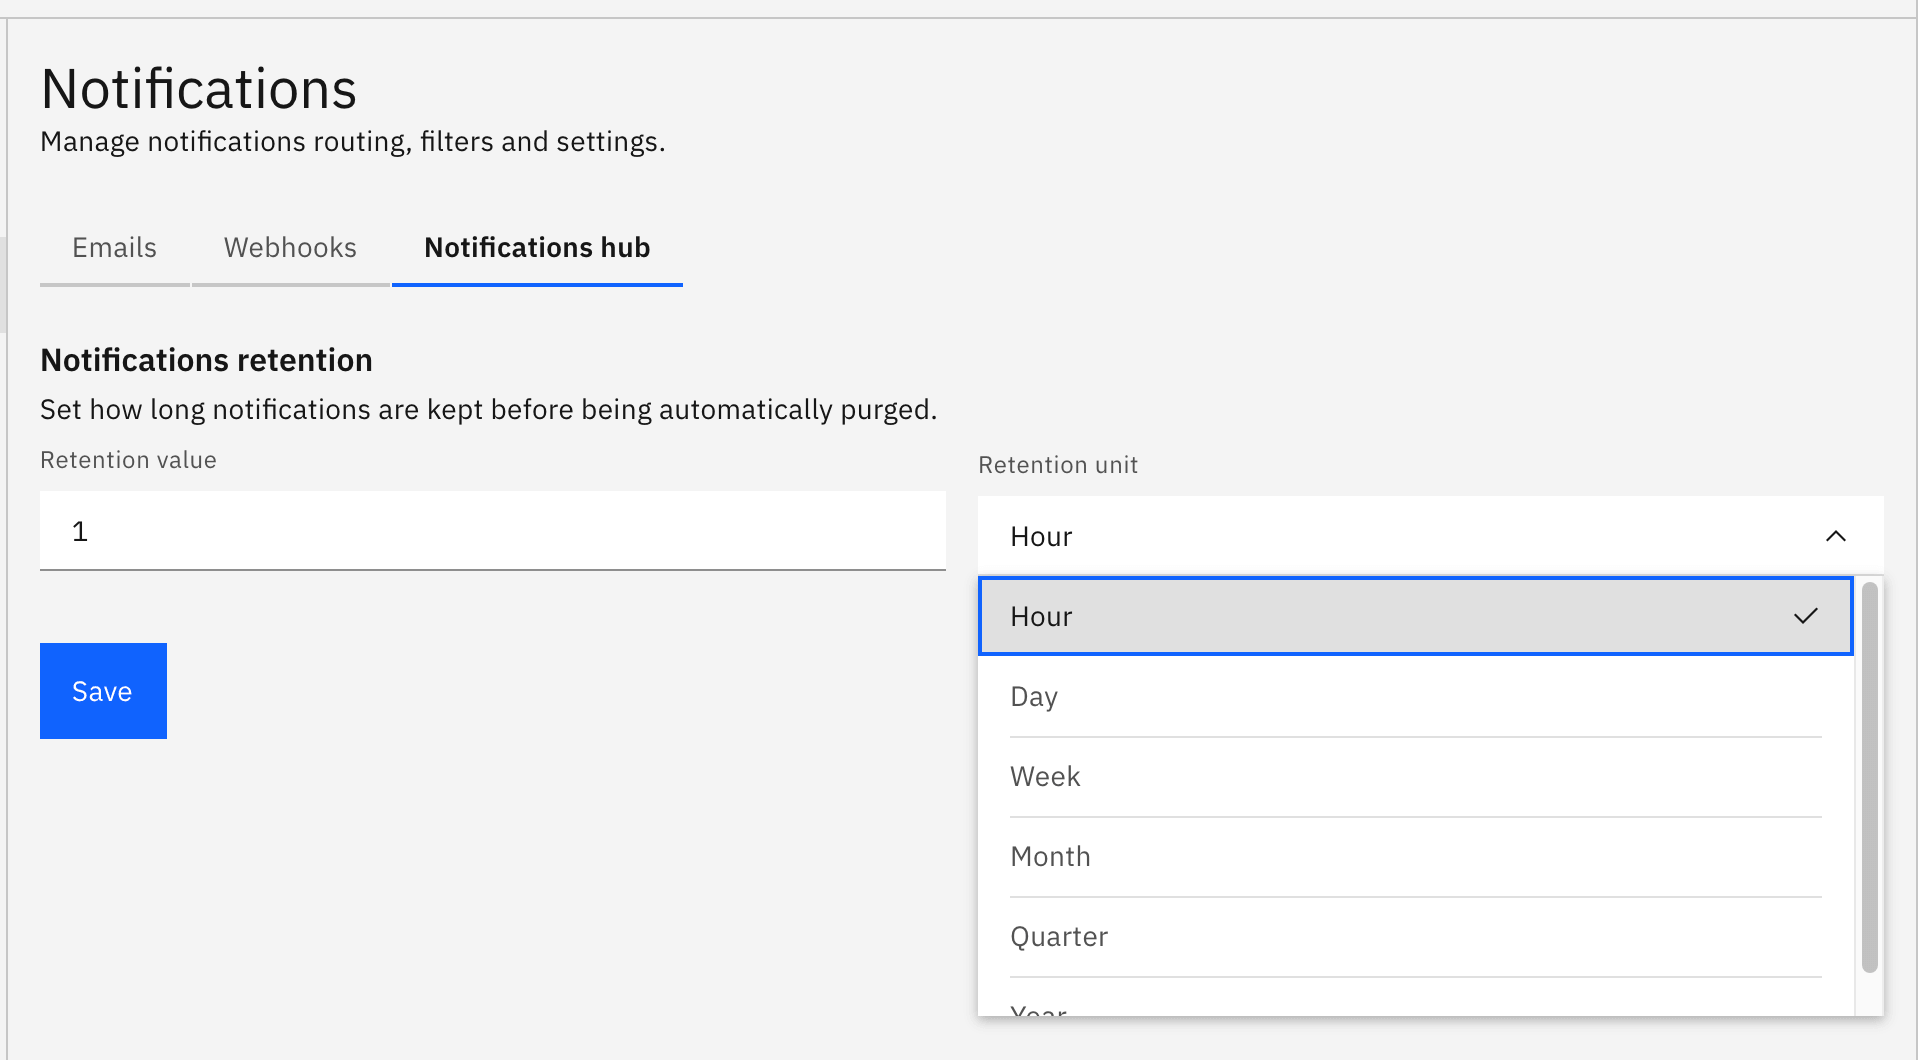
After the configured period, Core Hub automatically removes older notifications from the Notifications and alerts history.
|
Set a retention period appropriate for the event volume and troubleshooting requirements of your environment. |
Related guides
Contact MOLO17 Support if you need assistance with the Control Plane or a notification you cannot resolve.