Adding Agents to your pipeline
Overview
Adding agents to your Gluesync pipeline is done through the pipeline creation or editing wizard. If the agent you need isn’t available in your current pipeline configuration, you can add it directly from the wizard interface.
Adding an agent
Step 1: Access the pipeline wizard
-
Navigate to the pipeline creation or editing wizard in the Gluesync Web UI;
-
Enter the Source or Target wizard configuration step.
Step 2: Initiate agent addition
If your desired agent isn’t available in the current selection:
-
Click on the Add Agent button in the pipeline wizard;
-
This will open the agent addition flow.

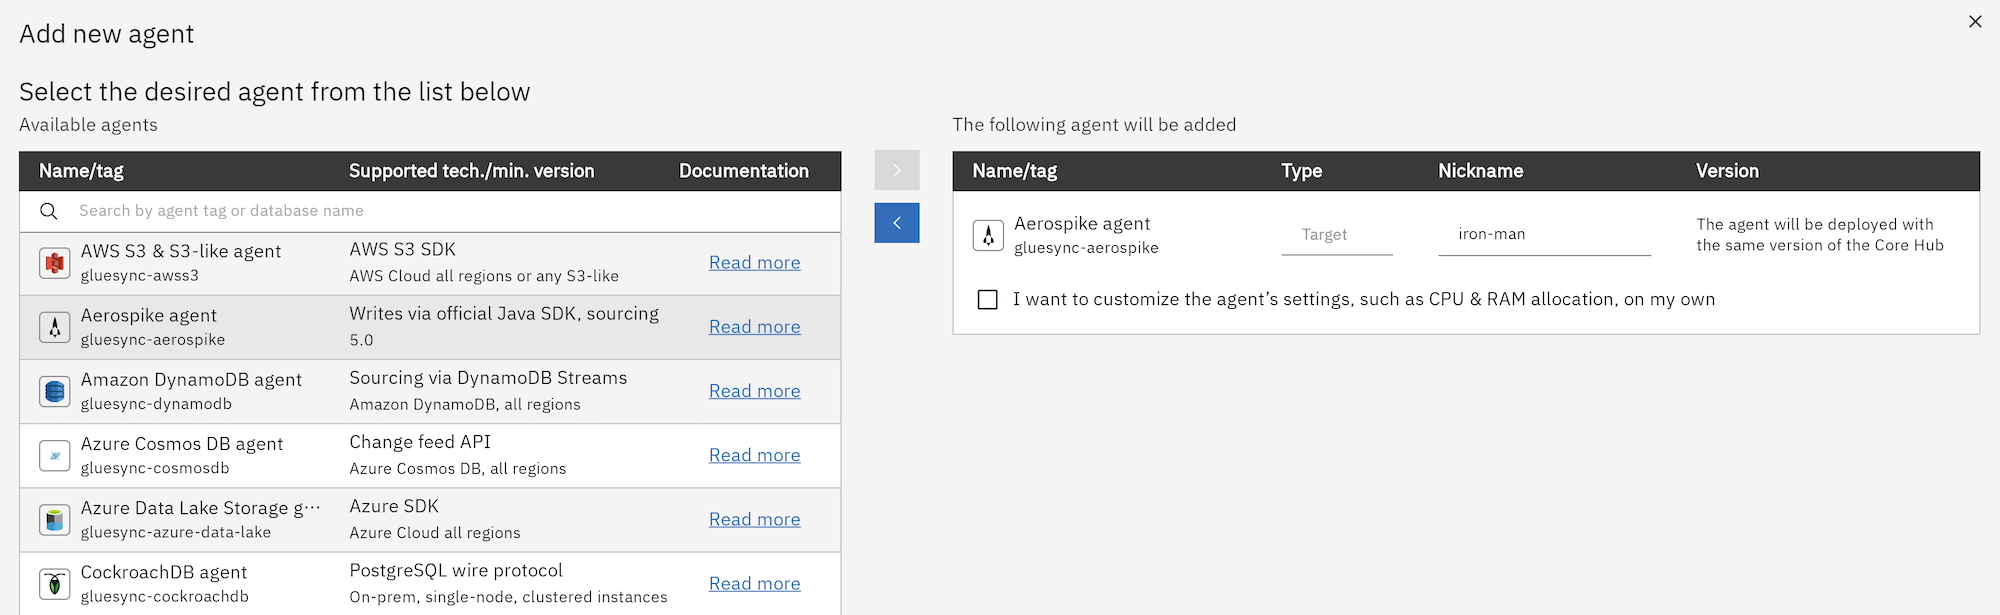
Step 3: Select the agent
From the agent addition panel:
-
Browse the left panel showing all available agents;
-
The list will show either source or target agents depending on your current step in the wizard;
-
Select the agent you want to add;
-
Click the right-pointing arrow to proceed with deployment
Deployment
-
After configuring your agent settings, click the Verify & Proceed button at the bottom right
-
The system will:
-
Pull the agent from the repository
-
Begin the deployment process
-
Complete deployment (typically takes less than a minute, depending on network bandwidth and local cache availability)
-
Best practices
-
Naming convention: Use descriptive names that indicate the database and environment (e.g., "PostgreSQL PROD", "MongoDB STAGING")
-
Resource planning: Start with default allocations and only customize if you have specific performance requirements
-
SSL security: Keep SSL enabled unless you have specific security requirements that necessitate disabling it
-
Testing: Test agent connections after deployment to ensure proper configuration
Troubleshooting
-
Deployment timeout: If deployment takes longer than expected, check network connectivity and repository availability
-
Resource conflicts: If you encounter resource allocation errors, review your advanced settings against available system resources
-
Agent unavailable: Ensure the Gluesync Conductor module is properly installed and running