Set up an Elasticsearch or OpenSearch target
Elasticsearch and OpenSearch are targets of the same Gluesync agent. Gluesync writes each source row as one document of an index, over the HTTP _bulk API, for the snapshot and for live changes. This guide shows how to prepare the cluster and a user with the rights Gluesync needs, create the connection and the pipeline, copy a PostgreSQL table, check the documents and the mapping, and recognize the errors you get when the address, the credentials or the rights are wrong.
In this guide
You will create a role and an API key on Elasticsearch, connect Gluesync with a user name and password or with the API key, copy a table with a snapshot and CDC, read the documents back with the search API, see how the index name and the field types are chosen, and tune the index name, the replicas and the bulk size. The same steps connect OpenSearch. A symptom, cause and fix table closes the guide.
Quick information
Goal |
Replicate a relational table to an Elasticsearch or OpenSearch index and confirm inserts, updates and deletes |
Audience |
Data engineers and cluster administrators |
Level |
Intermediate |
Time required |
About 45 minutes |
Area |
Control Plane → Data pipelines → Entities; Elasticsearch → Dev Tools or |
Applies to |
Gluesync 2.3 |
Before you begin
Make sure that:
-
You have a source that Core Hub can read with CDC. This guide uses PostgreSQL with
wal_level = logical(see PostgreSQL CDC with WAL) and a tableshop.orders; -
You have an Elasticsearch or OpenSearch cluster that Core Hub can reach over HTTP or HTTPS, on port
9200by default. This guide was tested with Elasticsearch 8.15 with security on, and OpenSearch 2.17 with the security plugin off; -
You can sign in to the Control Plane with a role that can create pipelines, and you can call the cluster API as an administrator;
-
On Linux, the host of a self-managed cluster needs
vm.max_map_countof at least262144. If it is lower, the cluster process stops during start.
|
Gluesync only writes to the cluster. The agent has no source role, so it cannot read changes from Elasticsearch or OpenSearch. See Elasticsearch agent for Gluesync for what is supported. |
Guide steps
SQL
Skip this step if you already have a table to copy. It creates a table with the types that matter for a document store.
-
On the source PostgreSQL database, run:
CREATE SCHEMA shop;
CREATE TABLE shop.orders (
  id integer PRIMARY KEY, customer varchar(100) NOT NULL, status varchar(20),
  amount numeric(12,2), quantity integer, paid boolean,
  created_at timestamp, shipped_at timestamptz, ship_date date,
  note text, meta jsonb, tags text[]);
INSERT INTO shop.orders VALUES
 (1,'Acme Spa','new',1500.50,3,true,'2026-11-01 10:00:00',
  '2026-11-02 08:30:00+01','2026-11-02','first order','{"tier":"gold"}','{a,b}'),
 (2,'Globex','paid',99.99,1,false,'2026-11-01 11:15:00',NULL,NULL,NULL,NULL,NULL);
CLI
Gluesync needs to bulk-index, update and delete documents, to create an index when it is missing, and to list the indexes and read their mappings when you add an entity. The role below worked in our test. Run the calls as an administrator, for example in Kibana Dev Tools or with curl.
-
Create the role. It covers the indexes whose names start with
shop-, and the index nameorders, because the entity picker reads the mapping of an index named like the source table before you choose the target name:PUT _security/role/gluesync_writer { "cluster": ["monitor"], "indices": [{ "names": ["shop-*", "orders"], "privileges": ["create_index", "write", "delete", "view_index_metadata", "read", "monitor"] }] } -
Create a user for Gluesync:
PUT _security/user/gluesync { "password": "<a strong password>", "roles": ["gluesync_writer"] } -
Or create an API key instead of a user:
POST _security/api_key
{
  "name": "gluesync",
  "role_descriptors": {
    "gluesync_writer": {
      "cluster": ["monitor"],
      "indices": [{
        "names": ["shop-*", "orders"],
        "privileges": ["create_index", "write", "delete", "view_index_metadata", "read", "monitor"]
      }]
    }
  }
}
Keep the value of
encodedfrom the answer. You will paste it into the Password field.
|
OpenSearch has its own security plugin and role format. Create a role there with the same rights: write, delete and create index on the indexes that Gluesync uses. The calls above are Elasticsearch calls and were not run against OpenSearch. |
UI
-
Open Data pipelines;
-
Select the + button (Create pipeline), or Create your first pipeline on a new installation. The Agents setup wizard opens on 1. Setup source;
-
Select the PostgreSQL source and enter its connection, then select Test and continue and Next;
-
On 2. Setup target(s), search for
elasticand select the Elasticsearch agent tile under NoSQL. The form that opens is titled Elasticsearch / OpenSearch;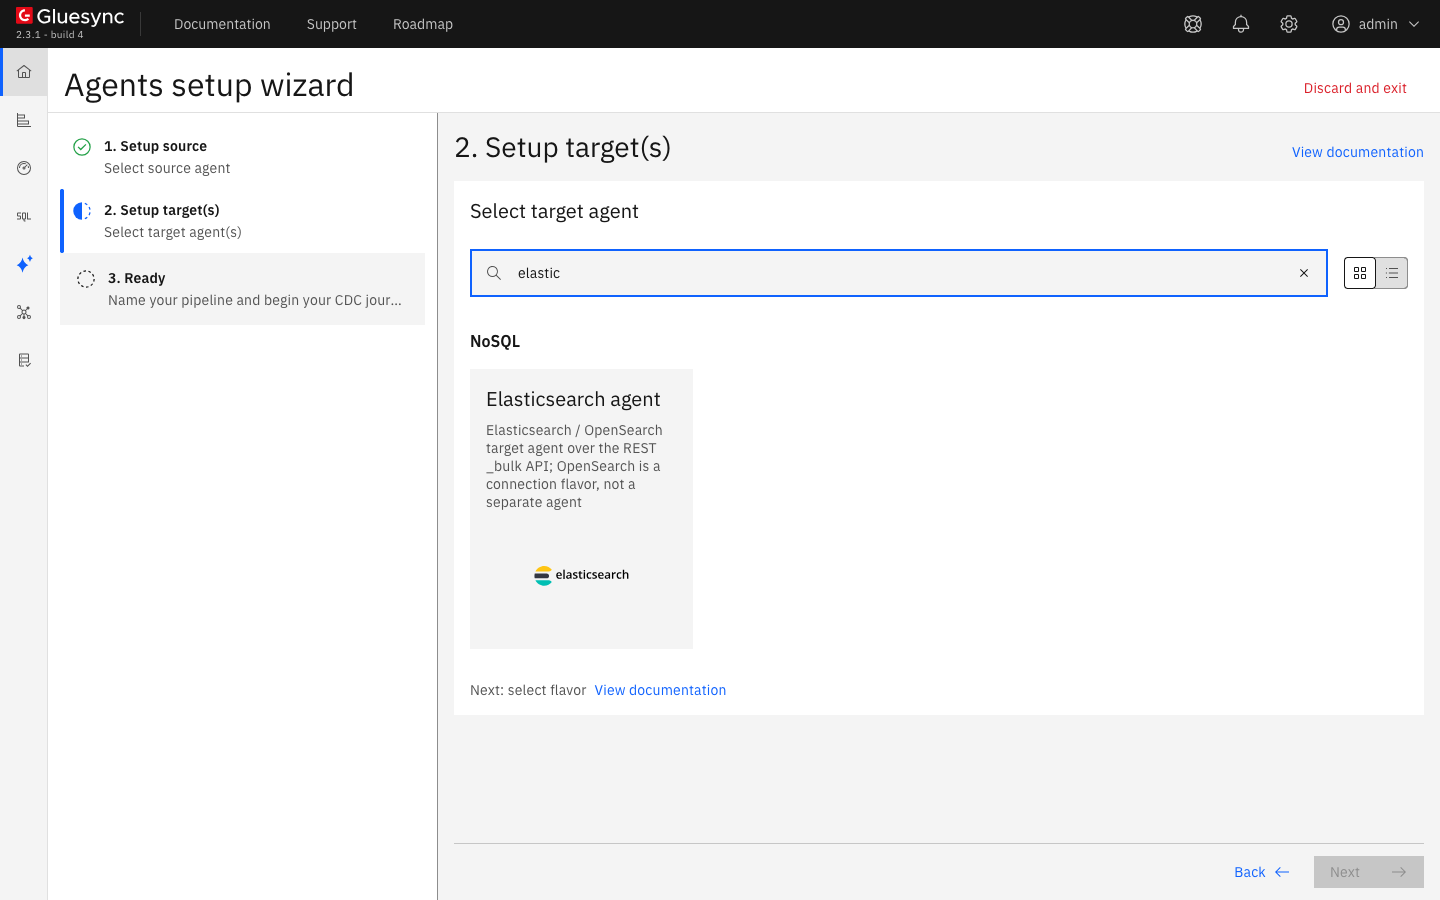
-
Enter Node address (a node of the cluster) and Port (
9200); -
For a user, enter Username and Password. For an API key, leave Username empty, paste the
encodedvalue in Password and set Authentication mode toAPI_KEY. The other values of Authentication mode areBASIC(the default) andBEARER. Turn on Disable auth only for a cluster that allows anonymous access;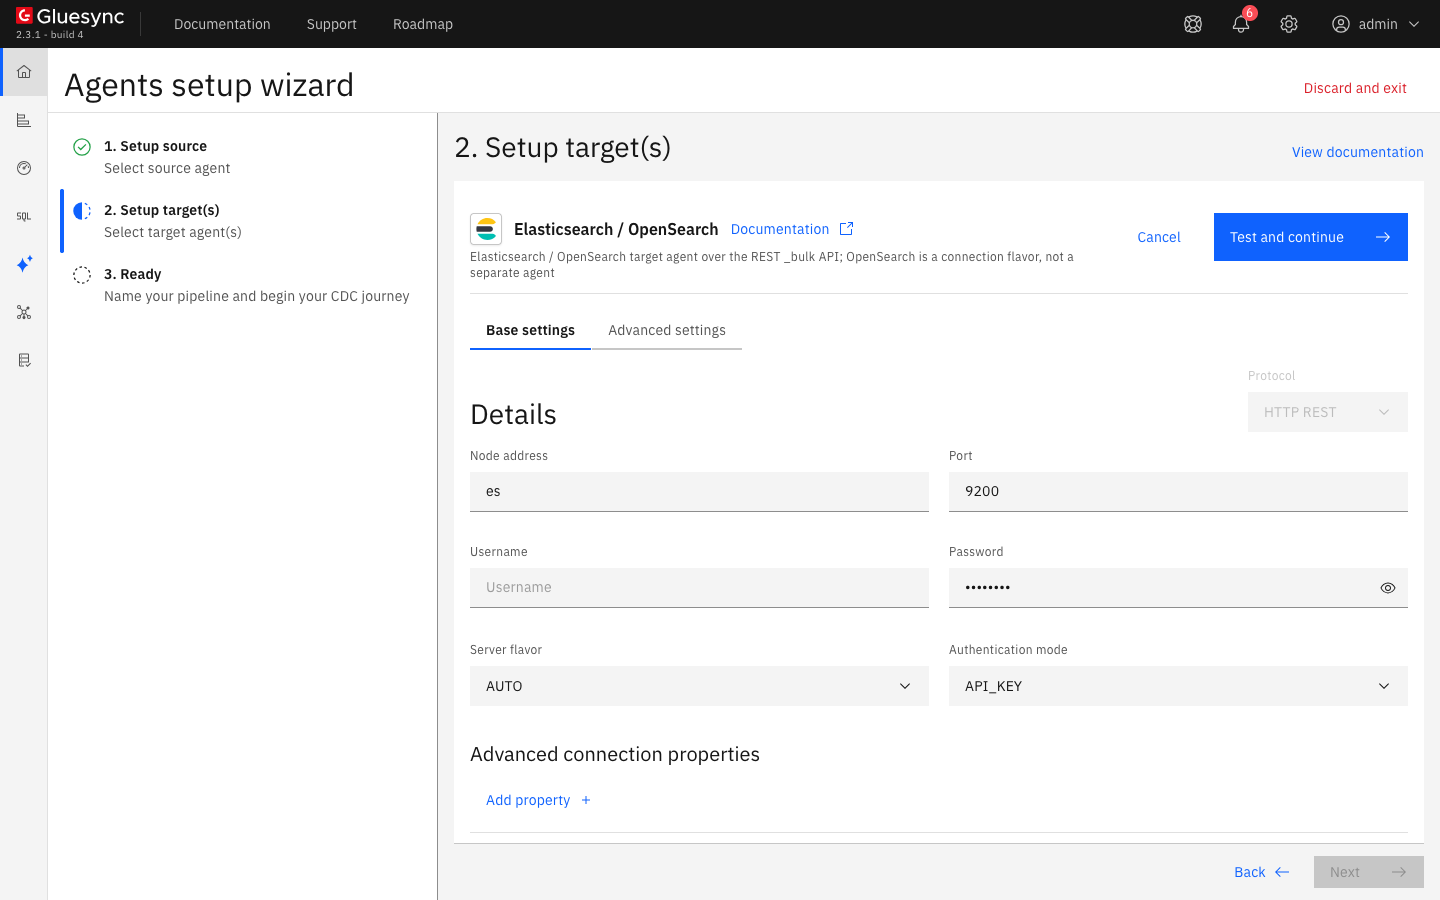
-
Turn on Enable TLS when the cluster answers on HTTPS. Under Upload 'certificate store' file, select Upload files or Use a path when the cluster uses its own certificate authority;
-
Optional: set Server flavor to
ELASTICSEARCHorOPENSEARCH. The defaultAUTOrecognized both clusters in our test. Under Advanced connection properties, Add property offers Path prefix, Connect timeout (seconds), Request timeout (seconds) and Strict host name check. Additional nodes takes more nodes of the same cluster; -
Select Test and continue, then Next;
-
On 3. Ready, enter a Pipeline name and select Finish.
|
|
UI
In the field mapping, the target Target Index namespace is an optional name part of the index, and the target Target Index is the index itself.
-
In the pipeline, select Entities. The Add entities page opens;
-
In the Object browser, expand the schema
shopand tickorders; -
Select Confirm and continue. The entity
shop.ordersis in the Hold group; -
Optional: open the three-dot menu of the entity and select Edit mapping. The Field mapping dialog fills Target Index namespace with
shopand Target Index withorders, links every field, and shows the field types that Gluesync will create. Select Confirm, then Confirm and continue.
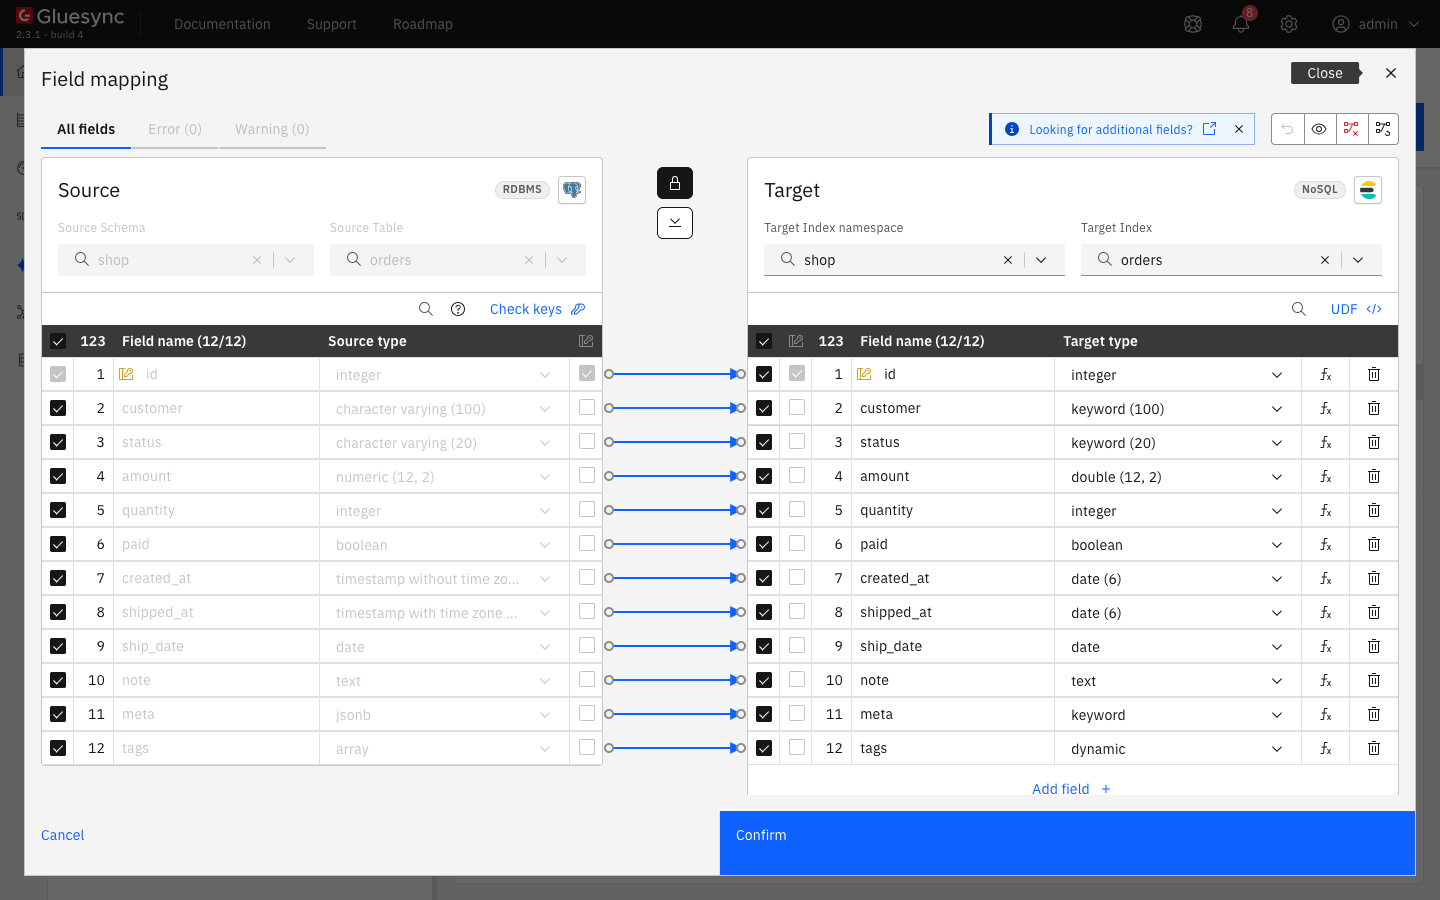
The index name is the prefix, the schema and the table joined with hyphens, in lower case. With no prefix and the schema shop, the index of orders is shop-orders. Each document gets the identifier shop::orders::<key>. See Index names for the rules and for how to change them.
UI
-
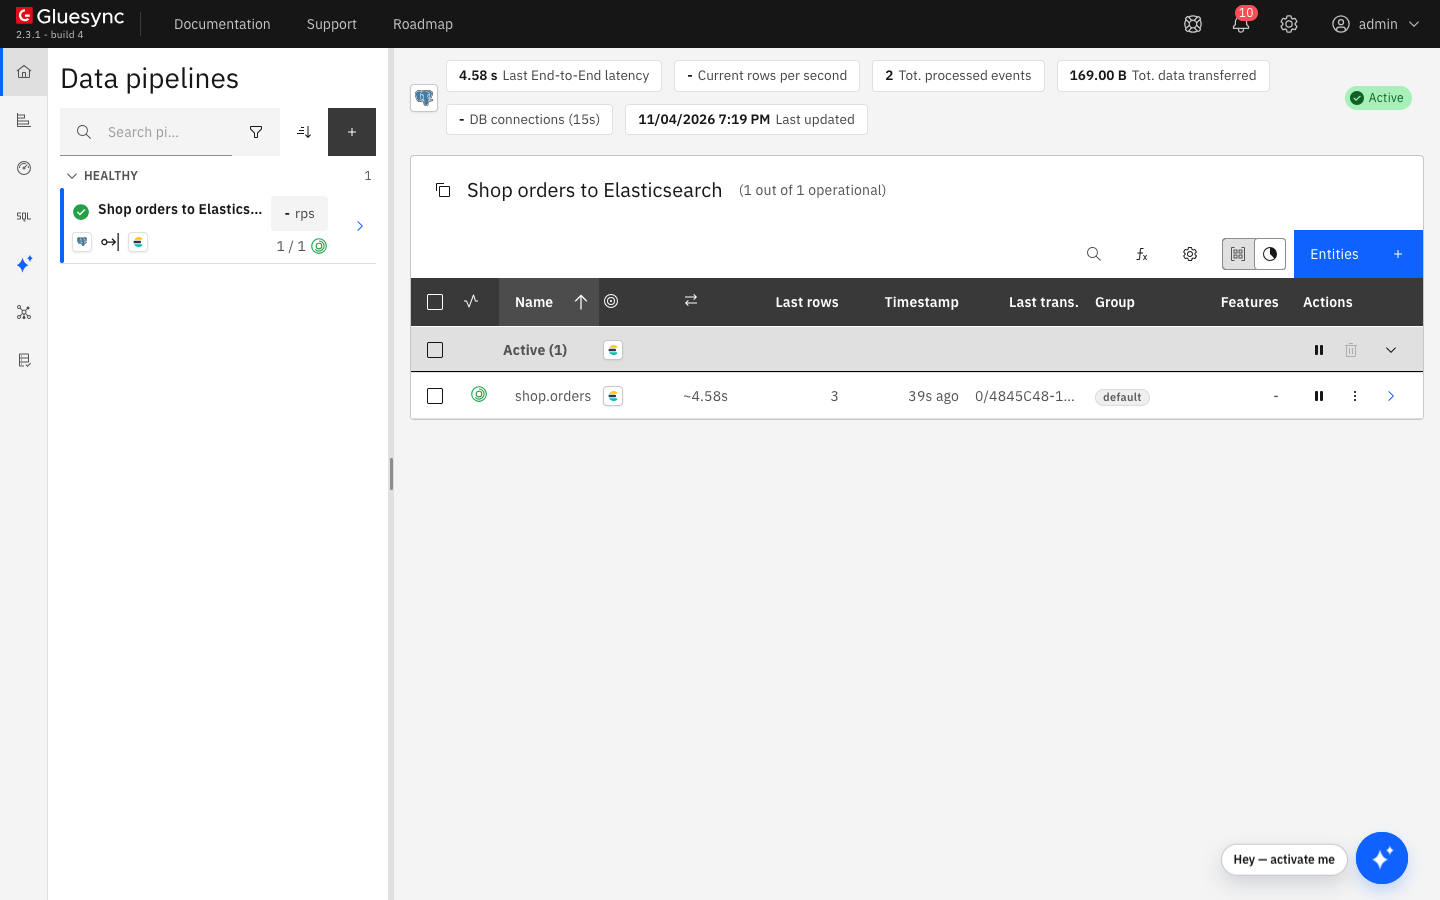
In the row of the entity, select the start icon (Start). The dialog Sync changes (CDC) opens;
-
In Start from, keep Full copy (marked Recommended for the first start) and keep Keep and merge under Data already in the target;
-
Select Start entity.
CLI
-
Count and read the documents:
curl -s 'http://<node>:9200/shop-orders/_count' curl -s 'http://<node>:9200/shop-orders/_search?sort=id&pretty' -
Read the mapping that Gluesync created:
curl -s 'http://<node>:9200/shop-orders/_mapping?pretty' -
Change the source and read again. These statements update, insert and delete a row:
UPDATE shop.orders SET status = 'shipped', amount = 1600.75 WHERE id = 2;
INSERT INTO shop.orders (id, customer, status, amount, quantity, paid, created_at)
  VALUES (3, 'Initech', 'new', 10.10, 2, false, now());
DELETE FROM shop.orders WHERE id = 1;
UI
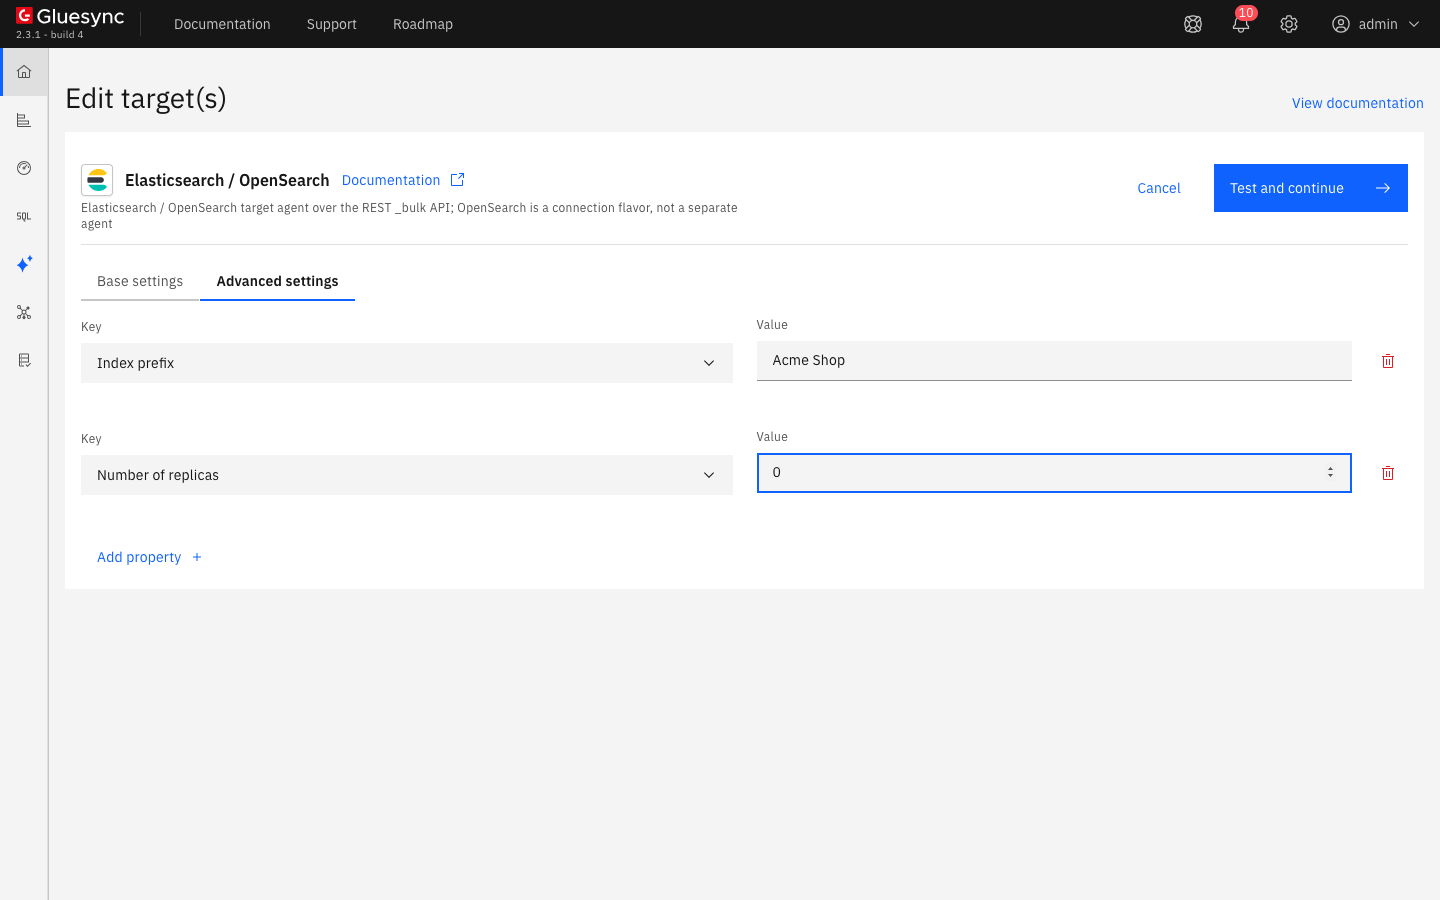
These settings are on the target. Change them before you start the entity: Gluesync creates an index once and leaves an existing index, with its mapping and its replicas, alone. A new prefix on an entity that already runs makes the next write go to a new index and leaves the old index as it is.
-
Open the gear menu of the pipeline toolbar, select Edit target and open the Advanced settings tab;
-
Select Add property and pick a key from Key. The keys are Index prefix, Index name template, Insert action, Refresh policy, Truncate strategy, Create index if missing, Explicit mapping, Number of shards, Number of replicas, Document id field, Decimals as strings, Bulk batch size and Bulk request size limit (bytes);
-
To add a prefix, set Index prefix (for example
Acme Shop). The index becomesacme_shop-shop-orders: the name is lower-cased and the space becomes an underscore; -
On a one-node cluster, set Number of replicas to
0. The default is 1 shard and 1 replica, and a replica has no node to live on, so the index stays yellow; -
To write bigger batches, raise Bulk batch size (default
1000) or Bulk request size limit (bytes) (default5242880); -
Optional: Refresh policy is
NONE(default),WAIT_FORorIMMEDIATE, Insert action isINDEX(default) orCREATE, and Truncate strategy isDELETE_BY_QUERY(default) orSKIP; -
Select Test and continue.
For one entity, Edit settings has an Entity tab with Index name override, Ingest pipeline and Bulk batch size override.
Index names
Gluesync picks the name in this order:
-
Index name override of the entity, when set. In our test, the value
Orders Override/1gave the indexorders_override_1; -
otherwise
<prefix>-<scope>-<collection>, where the prefix is Index prefix, the scope is Target Index namespace and the collection is Target Index. An empty part is left out.
The name is then made valid: it is lower-cased, and characters that an index name cannot hold, such as a space or a slash, become an underscore. Index name template in the Advanced settings of the target is a third way to build the name.
Data type notes
Explicit mapping is on by default, so Gluesync creates one field per column. What we saw with the PostgreSQL table above:
| Source column | Field type | Notes |
|---|---|---|
|
|
Exact match. Use |
|
|
The sub-field has |
|
|
|
|
|
Pick |
|
|
Written as ISO-8601 text, for example |
|
|
Written in UTC, for example |
|
|
The document holds the JSON as a string. Choose |
|
dynamic, shown by the cluster as |
The document holds a JSON array. An array has no native mapping type: choose |
|
JSON |
A partial update with |
The target type list of the field mapping offers keyword, text, boolean, short, byte, integer, long, float, double, scaled_float, date, date_nanos, binary, dynamic, object, nested and flattened. An update of a document that is missing creates it: in our test, deleting a document in the cluster and then updating its source row wrote the whole row again.
Troubleshooting
| Problem | Possible cause | What to do |
|---|---|---|
Test and continue fails with |
The host name does not resolve from Core Hub. |
Use a name or address that Core Hub can resolve. Inside a container, |
Test and continue fails with |
Nothing listens on that port, or a firewall blocks it. |
Check the port (default |
|
Enable TLS is on, but the cluster answers in plain HTTP. |
Turn off Enable TLS, or turn on TLS on the cluster. For a private certificate authority, use Upload 'certificate store' file. |
|
The user name or the password is wrong. |
Check them with |
|
Disable auth is on, or the credentials are empty, but the cluster requires them. |
Turn off Disable auth and enter Username and Password, or the API key. |
|
The API key or the token is wrong, or Authentication mode does not match what you entered. |
Use |
Tables Fetch notification: |
The role has no |
Add |
Tables Columns Fetch notification: |
The role does not cover the index that is named like the source table. |
Add the table name to |
Permission Denied notification: |
The role has no |
Add the privilege to the role (see step 2). The entity resumes by itself. You can also create the index yourself and turn off Create index if missing. |
The index is yellow and |
The default 1 replica has no second node. |
Set Number of replicas to |
The index has an unexpected name |
The name was lower-cased and normalized, or a prefix or an Index name override applies. |
See Index names. Search |
A search on a |
|
Map the field as |
Requests to the cluster time out or the cluster answers with HTTP 429 or 5xx |
The cluster is busy or a node is down. |
Lower Bulk batch size or Bulk request size limit (bytes), raise Request timeout (seconds) under Advanced connection properties, and add nodes in Additional nodes. |