Objects Browser
Overview
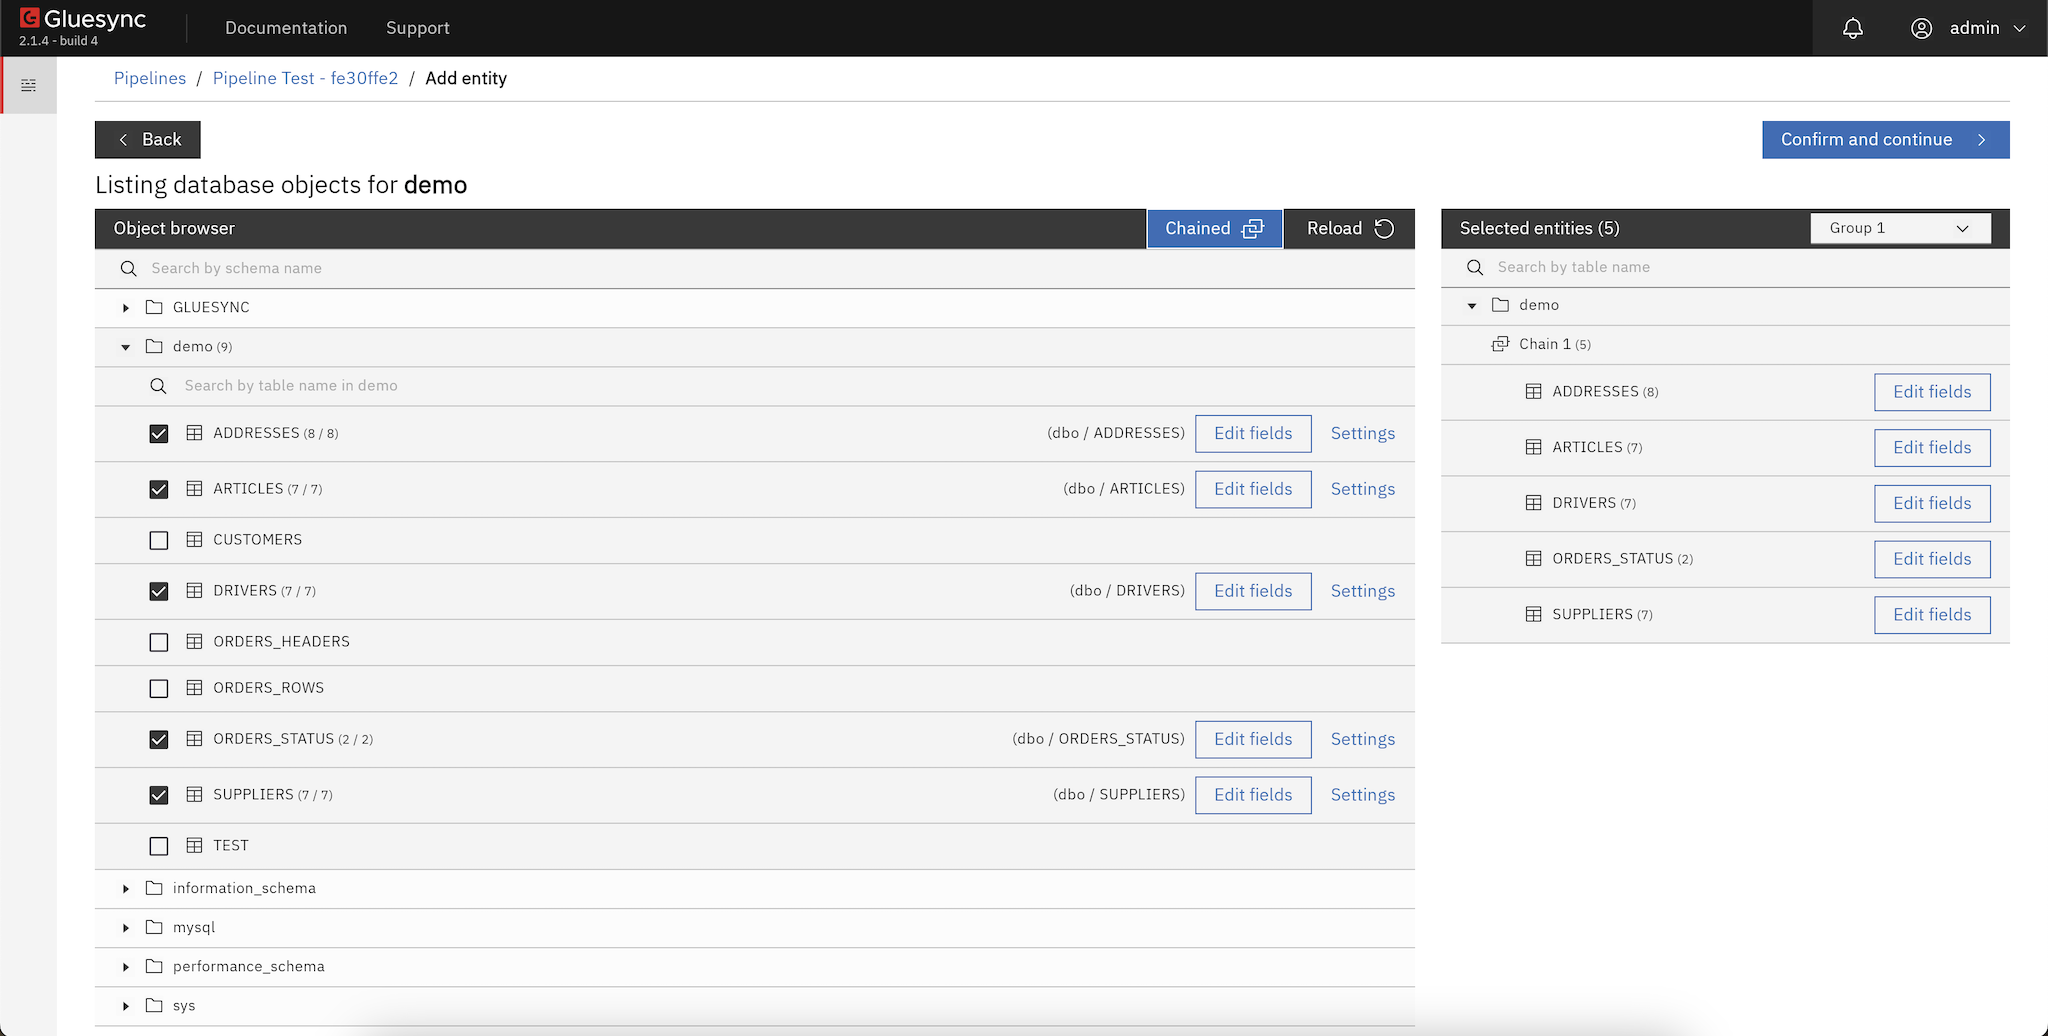
The Objects Browser is the main entry point for creating and editing entities (also called replication tasks) in Gluesync’s Control Plane. It lets you browse the source database objects—such as schemas and tables—search across large datasets, select what to replicate, and associate those selections with a target counterpart.
After you select your desired matches, the Objects Browser provides controls to apply custom settings, edit schema options for source and target fields, configure Custom Field Functions or UDFs, define chains, associate entities to groups, and work in bulk.
Key capabilities
-
Browse source-side objects (schemas, tables) and inspect structure.
-
Search and filter to quickly find objects in large datasets.
-
Select one or more tables to replicate.
-
Associate selected source tables with target counterparts.
-
Apply per-entity settings and edit schema mappings for source and target.
-
Fill target columns from one or more source columns with Custom Field Functions.
-
Create and attach UDFs for custom transformations (learn more).
-
Create chains and associate entities to groups for orchestration (learn more).
-
Perform bulk actions across multiple selected entities.
UI tour
-
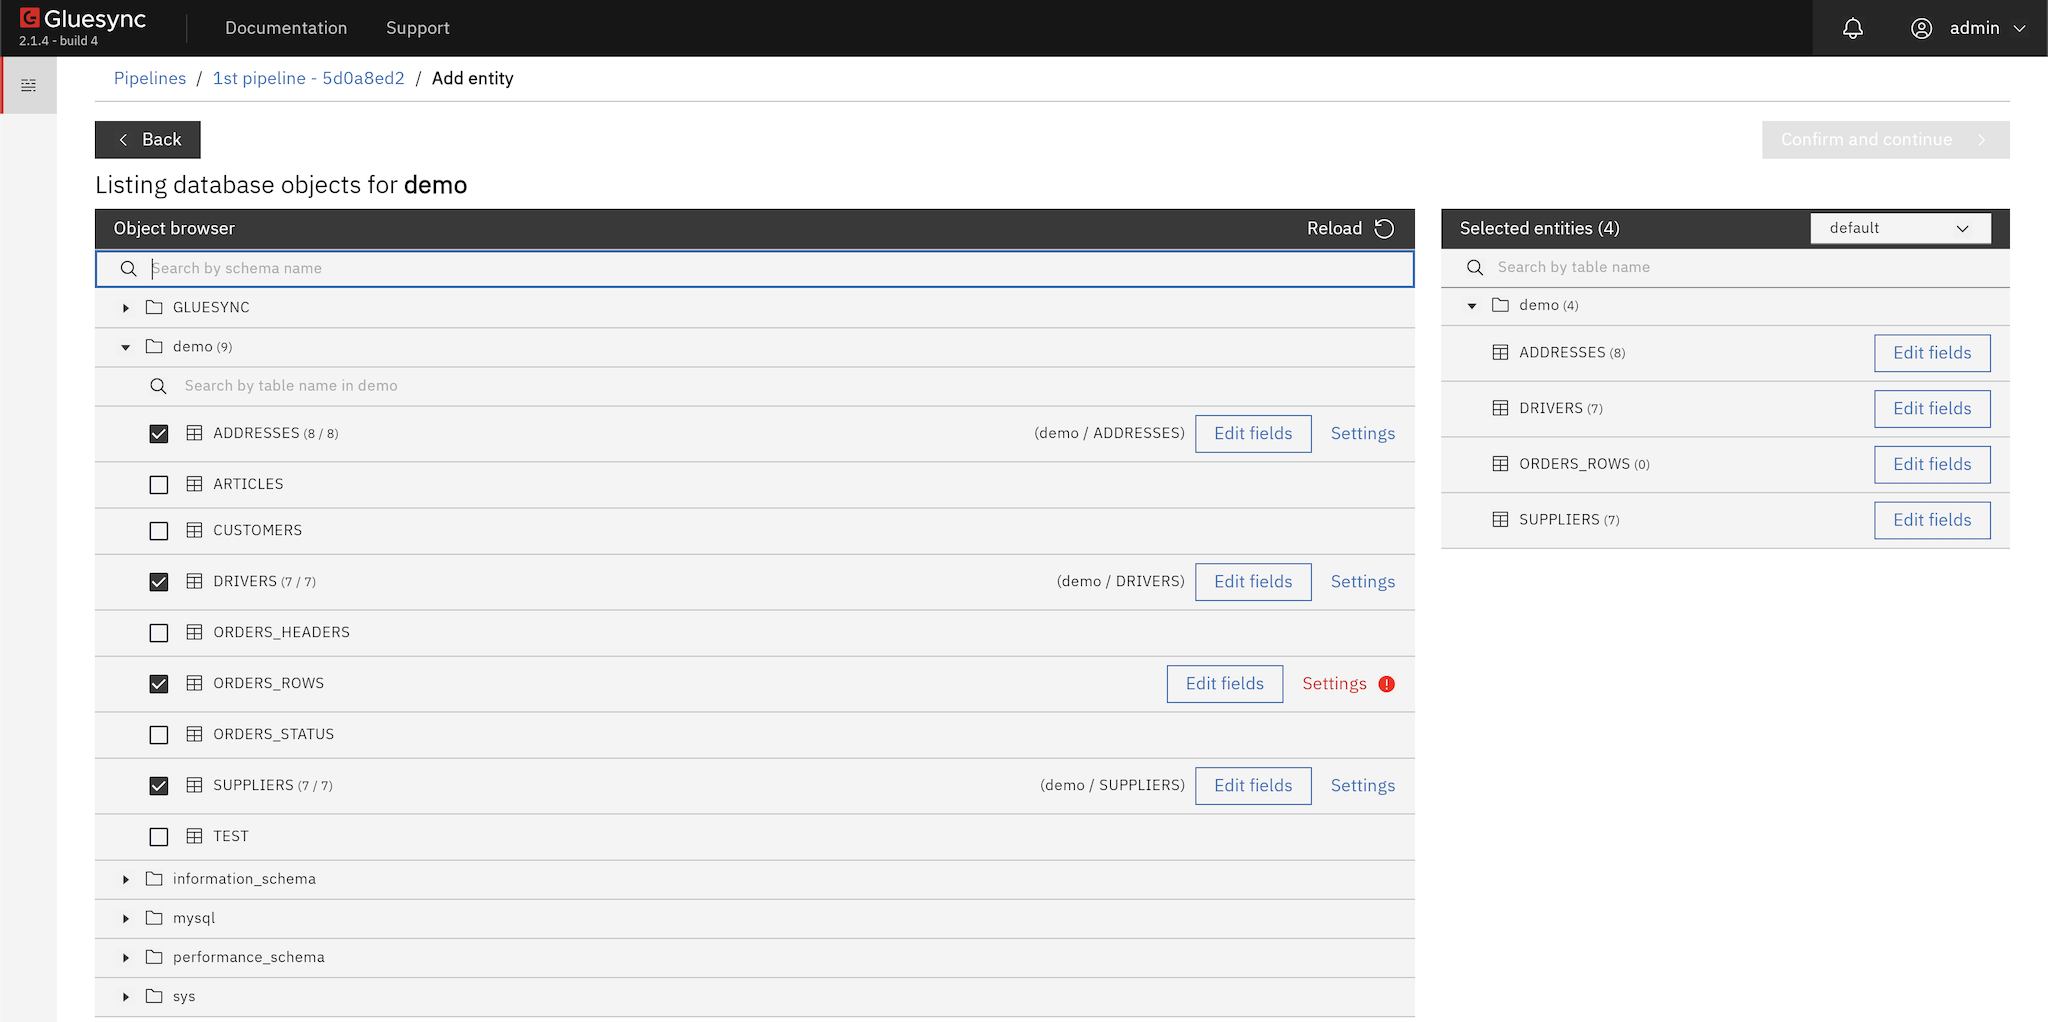
Source navigation panel: browse schemas and tables.
-
Main results panel: search results, table lists, and selection checkboxes.
-
Details/config panel: settings, schema editing, target mapping, UDFs, chains/groups.
|
To create many entities in one pass from a YAML or ZIP file, select Import entities in the Selected entities pane, or Or import them from a file when no entity is selected yet. Each table of the file is checked against the pipeline, and you choose which ones to add. See Import entities from a file. |
Usage steps
-
Open the Objects Browser from the Control Plane.
-
Use the source navigation and/or search to locate your tables.
-
Select one or more tables you want to replicate.
-
Associate each selection with a target counterpart (existing or new, depending on your target setup).
-
Configure settings and schema options for the selected entity/entities.
-
(Optional) Open the Fields Editor to adjust the mapping: draw arrows between source and target fields, add fields, or change target types where the target allows it (Fields Editor).
-
(Optional) Configure a Custom Field Function to compose an individual target column from reusable pipeline-level logic (Custom Field Functions).
-
(Optional) Create or attach a UDF to handle transformations that align source data to your target schema (User Defined Functions).
-
(Optional) Add the entity to a chain or a group to orchestrate execution order and logical grouping (Groups & Chains).
-
Save and deploy your changes, or leave the page without saving (see Leaving without saving).
| On an IBM i source, logical files and SQL views are supported for snapshot only: CDC doesn’t capture their changes. They are shown with the view icon. To replicate changes, select the underlying physical file instead. See IBM i logical files and views. |
Leaving without saving
The breadcrumb at the top shows the pipeline and, when you edit an entity, the entity. Select either name to open it.
The button next to Confirm and continue shows whether the entity has unsaved changes:
-
Exit: nothing has changed since you opened the entity or last reloaded it. It takes you straight back to where you opened this page from: the entity’s details page or the pipeline.
-
Discard and exit: you changed something, such as the target table, the selected columns, a field function, a UDF, the entity settings, the group or the chain. It asks for confirmation: choose Discard changes to leave without saving and go back to where you opened this page from, or Cancel to keep editing.
Confirm and continue also takes you back there once the entity is saved. If you opened this page from a bookmark or a pasted link, leaving takes you to the entity’s details page when you edit an entity, or to the pipeline when you add entities.
When there are unsaved changes, your browser’s Back button and the breadcrumb links ask for the same confirmation. Reloading or closing the browser tab asks your browser to confirm while there are unsaved changes, or while the Fields Editor is open.
When adding entities, Exit is shown until you select a table.
Adjustments Gluesync makes on its own when the entity opens, such as the reset after missing columns are detected or the migration of an entity saved with an unlocked schema, don’t count as changes. Save the entity to keep them.
| Compiling a UDF saves its code immediately, and a table created from the Fields Editor already exists on the target. Discard changes doesn’t undo either of them. |
Working with large datasets
-
Use the search bar to filter by schema, table name, or partial matches.
-
Select multiple tables and apply bulk actions to save time.
Bulk operations
-
Bulk select/deselect tables in the results panel.
-
Apply shared settings (e.g., target mapping defaults) across the current selection.
-
Execute batch schema edits when consistent changes are required across several entities.
-
Import entities from a file instead of selecting tables one by one, as the tip at the top of this page says. Importing creates entities; it is not Bulk load, which is about how data is written.
|
When applying bulk operations, review exceptions. Some tables may require custom handling due to differing schemas or constraints. |
Advanced actions
-
Custom Field Functions: Fill a target column with reusable Java logic that can take several source columns as inputs. See Custom Field Functions.
-
UDFs: Attach a function to perform validations, transformations, merges, and type conversions during replication. See User Defined Functions.
-
Chains & Groups: Define execution order and logical groupings to coordinate multiple entities. See Groups & Chains.
-
Arrow mapping: When you need to deviate from a 1:1 mapping, draw N:1 or 1:N arrows, add target fields, and change target types where the target allows it. See Mapping fields with arrows.
Best practices
-
Start with a small selection to validate mappings and transformations, then scale out.
-
Keep UDFs focused and efficient to maintain throughput.
-
Name technical fields clearly when customizing schemas (e.g.,
source_table,ingestion_ts). -
Test changes in a staging environment before production rollout.
-
Document your mapping and transformation decisions for team knowledge sharing.
Troubleshooting
-
Tables not found: Confirm source connectivity and that the correct schema filters are applied.
-
Target mapping errors: Verify target DDL and permissions, and ensure your mappings align with target constraints.
-
Transformation/type errors: Check UDF logs and confirm that produced values match target column types (see UDFs).
-
Bulk apply differences: Some tables may require overrides; apply per-entity adjustments as needed.