Logical partitioning for snapshot tasks
Logical partitioning allows you to split a snapshot read over multiple logical ranges of a source table column. This improves performance when sourcing data from very large tables by parallelizing the snapshot across several threads.
Overview
During a snapshot task, Gluesync normally scans the entire source table sequentially. On very large tables, this can lead to long snapshot times and uneven load on the source system.
With logical partitioning enabled, Gluesync divides the snapshot read into multiple partitions based on a chosen column. Each partition is processed in parallel, reducing total snapshot time and making better use of the available resources.
Logical partitioning is configured per-entity and applies only to snapshot tasks. It does not change how ongoing CDC replication works.
| Logical partitioning is especially useful when snapshotting large fact tables or history tables that would otherwise take a long time to scan. |
How logical partitioning works
When you enable logical partitioning for a snapshot task, Gluesync performs the following steps:
-
You choose how many logical partitions to create for the snapshot.
-
You select a column from the source table that will be used to define the partition ranges.
-
Gluesync scans the selected column to determine its value distribution.
-
Based on the scanned values, Gluesync automatically calculates a set of non-overlapping ranges and assigns each range to a partition.
-
The snapshot then runs multiple read threads in parallel, each reading one partition range.
Number of partitions
-
You can define between 1 and 10 logical partitions.
-
A higher number of partitions increases the level of parallelism and can reduce snapshot duration.
-
Very high partition counts may increase load on the source system; start with a moderate value and adjust based on observed performance.
When you set the number of partitions to 1, Gluesync still uses the selected column to define a single range, but the snapshot effectively runs as a single-threaded read.
|
Supported column types
Logical partitioning works on a single column from the source table. Gluesync currently supports:
-
Numeric columns (for example: integer identifiers, numeric keys)
-
Date and timestamp columns
Gluesync computes ranges by looking at the minimum and maximum values found in the selected column and then splitting that interval into the requested number of partitions.
Avoid using columns with very low cardinality (for example, a flag column with values 0/1) as they may produce unbalanced partitions.
|
Using the logical partitioning settings
You configure logical partitioning from the snapshot performance settings dialog for an entity.
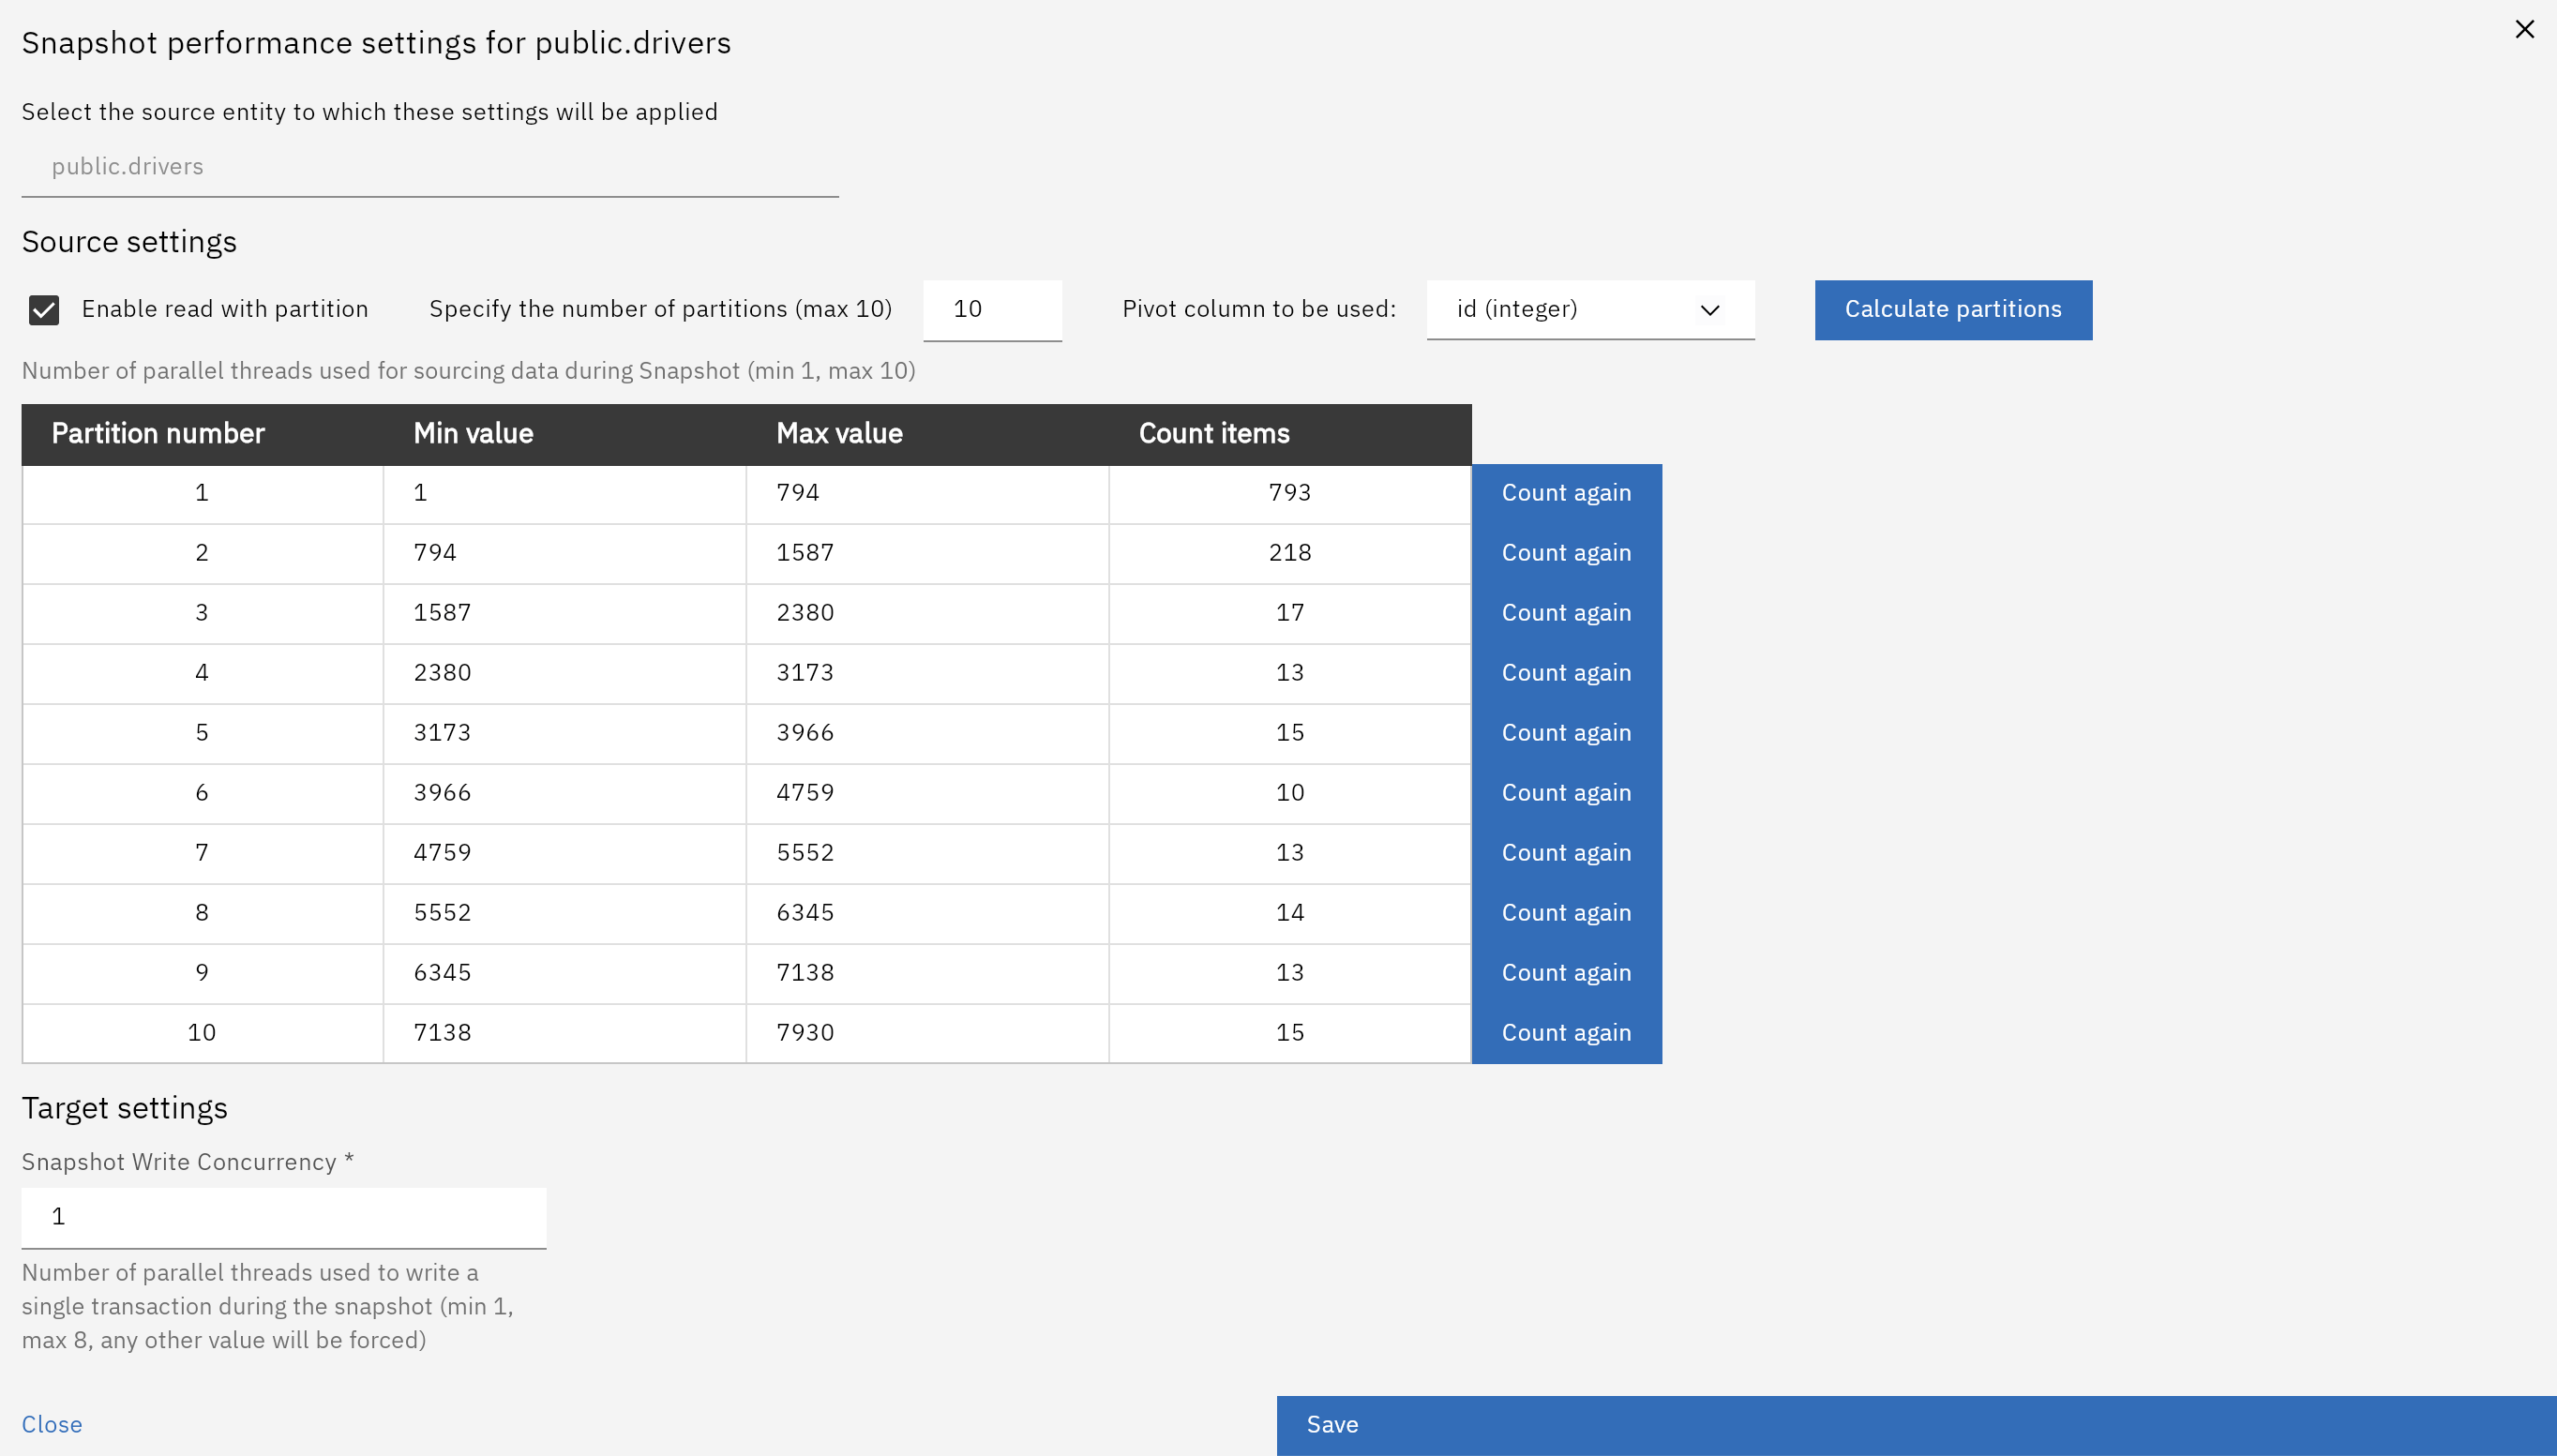
The dialog contains the following key options and information:
-
Enable read with partition – turns logical partitioning on or off for the snapshot.
-
Specify the number of partitions (max 10) – sets how many logical partitions will be created.
-
Pivot column to be used – selects the source column used to build partition ranges (numeric and date-based types are supported).
-
Calculate partitions – instructs Gluesync to scan the selected column and compute the partition ranges.
After calculation, the Partition number table shows, for each partition:
-
Partition number – the partition index.
-
Min value and Max value – the value range for that partition.
-
Count items – the estimated number of rows in the range, which helps you verify that partitions are reasonably balanced.
If needed, you can re-run the calculation by using the Count again actions.
| Calculating partitions performs a scan of the selected column on the source system. On very large tables, this may take some time but is required to build accurate ranges. |
Configuring logical partitioning for a snapshot
To enable logical partitioning for an entity snapshot:
-
Open the entity in the Control Plane and navigate to the Play tab.
-
Choose Run snapshot.
-
Open the snapshot performance settings dialog.
-
Enable Read with partition.
-
Set the desired number of partitions (between 1 and 10).
-
Select the column to use as the pivot for partitioning.
-
Click Calculate partitions and review the generated ranges.
-
Save the configuration and start the snapshot.
| Combine logical partitioning with Snapshot tasks tuning options such as snapshot writing concurrency to balance read and write throughput end-to-end. |
Best practices and limitations
-
Target concurrency – Logical partitioning focuses on read parallelism. For best overall performance, also tune Snapshot writing concurrency on the target side, as documented in the snapshot tasks page.
-
Source system impact – Each partition is read by a separate thread. Monitor CPU, I/O, and connection limits on the source database when increasing the number of partitions.
-
Stable column choice – Use a column whose values do not change during the snapshot (for example, an immutable identifier or creation timestamp) to avoid inconsistent ranges.
-
Applicability – Logical partitioning is currently available for snapshot tasks only and does not affect continuous replication.
For more information about snapshot concepts and additional performance tuning options, see Snapshot tasks.