Add new agent
This guide explains how to add a new agent to your Gluesync deployment using Docker Compose, programmatically.
Prerequisites
Before proceeding, ensure you have:
-
Access to your Docker Compose file
-
Basic understanding of Docker Compose configuration
-
A valid image name for your database agent from the MOLO17 Docker Hub repository
Adding a new agent
Before manually editing your Docker Compose configuration, consider using the Gluesync Conductor module for a more user-friendly approach. Conductor provides a web-based interface to add and manage agents without direct YAML file manipulation. See the Adding agents guide for detailed instructions.
If you prefer manual configuration or don’t have Conductor installed, continue with the steps below to add agents directly to your Docker Compose file.
1. Reference documentation
For more details about managing the Docker Compose file, refer to: Gluesync Docker Compose Documentation
2. Locate your Docker Compose file
The Docker Compose file is located in your Gluesync deployment directory.
3. Copy existing agent service
To add a new source or target agent:
-
Open your docker-compose.yml file
-
Locate an existing source or target agent service
-
Copy the entire service block and add it into the file after the last service block
4. Rename the service
Change the service name to match your database name. For example, if your database is named "mydb", rename the service from:
previous-agent:to:
mydb-agent:5. Update the Docker image
-
Go to MOLO17’s Docker Hub
-
Search for your database image
-
Replace the image name in the configuration
For example, if you’re using PostgreSQL, change:
image: molo17/gluesync-previous-agent:latestto:
image: molo17/gluesync-postgresql:latest6. Update volume configuration
Locate in the volume configuration section the correct volume path and update it to use the same name as your service:
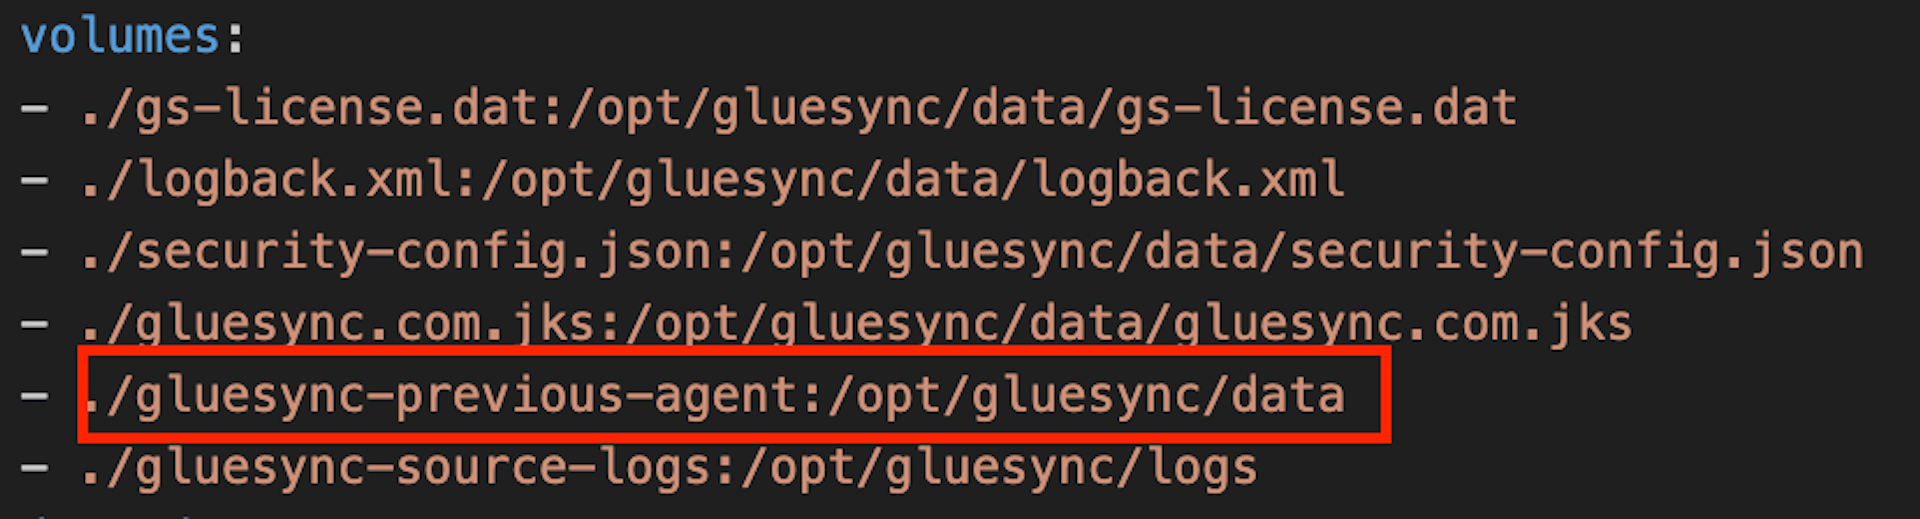
For example, if your service is named "mydb-agent", update the volume path:
volumes:
  - ./gluesync-previous-agent:/opt/gluesync/data
to:
volumes:
- ./gluesync-mydb-agent:/opt/gluesync/dataExample configuration
Here’s an example of a complete agent configuration:
gluesync-postgresql-source:
    restart: "unless-stopped"
    image: molo17/gluesync-postgresql:latest
    # deploy:
    #   resources:
    #     limits:
    #       cpus: "2.0"
    #       memory: 2.0G
    environment:
    - TYPE=source
    - SSL_ENABLED=true   # set to true if you want to activate TLS encryption
    - LOG_CONFIG_FILE=/opt/gluesync/shared/logback.xml
      # Time zone: defaults to UTC, you can change it to match yours (https://grokipedia.com/page/List_of_tz_database_time_zones#time-zones-by-region)
      # - TZ: "Etc/UTC"
    # comment that if you don't require the agent to connect to a locally hosted DB (via your host's localhost)
    extra_hosts:
    - "host.docker.internal:host-gateway"
    volumes:
    - ./shared:/opt/gluesync/shared:ro
    - ./logs/gluesync-postgresql-source:/opt/gluesync/logs
    - ./data/gluesync-postgresql-source:/opt/gluesync/data
    depends_on:
      gluesync-core-hub:
        condition: service_started