Chronos Scheduler
The Chronos Scheduler allows you to automate routine tasks in Gluesync, such as starting/stopping entities and pipelines, or running snapshots on a schedule. This guide will walk you through setting up and managing scheduled tasks.
Creating a New Schedule
Navigate to the Scheduler section in the Gluesync Core Hub
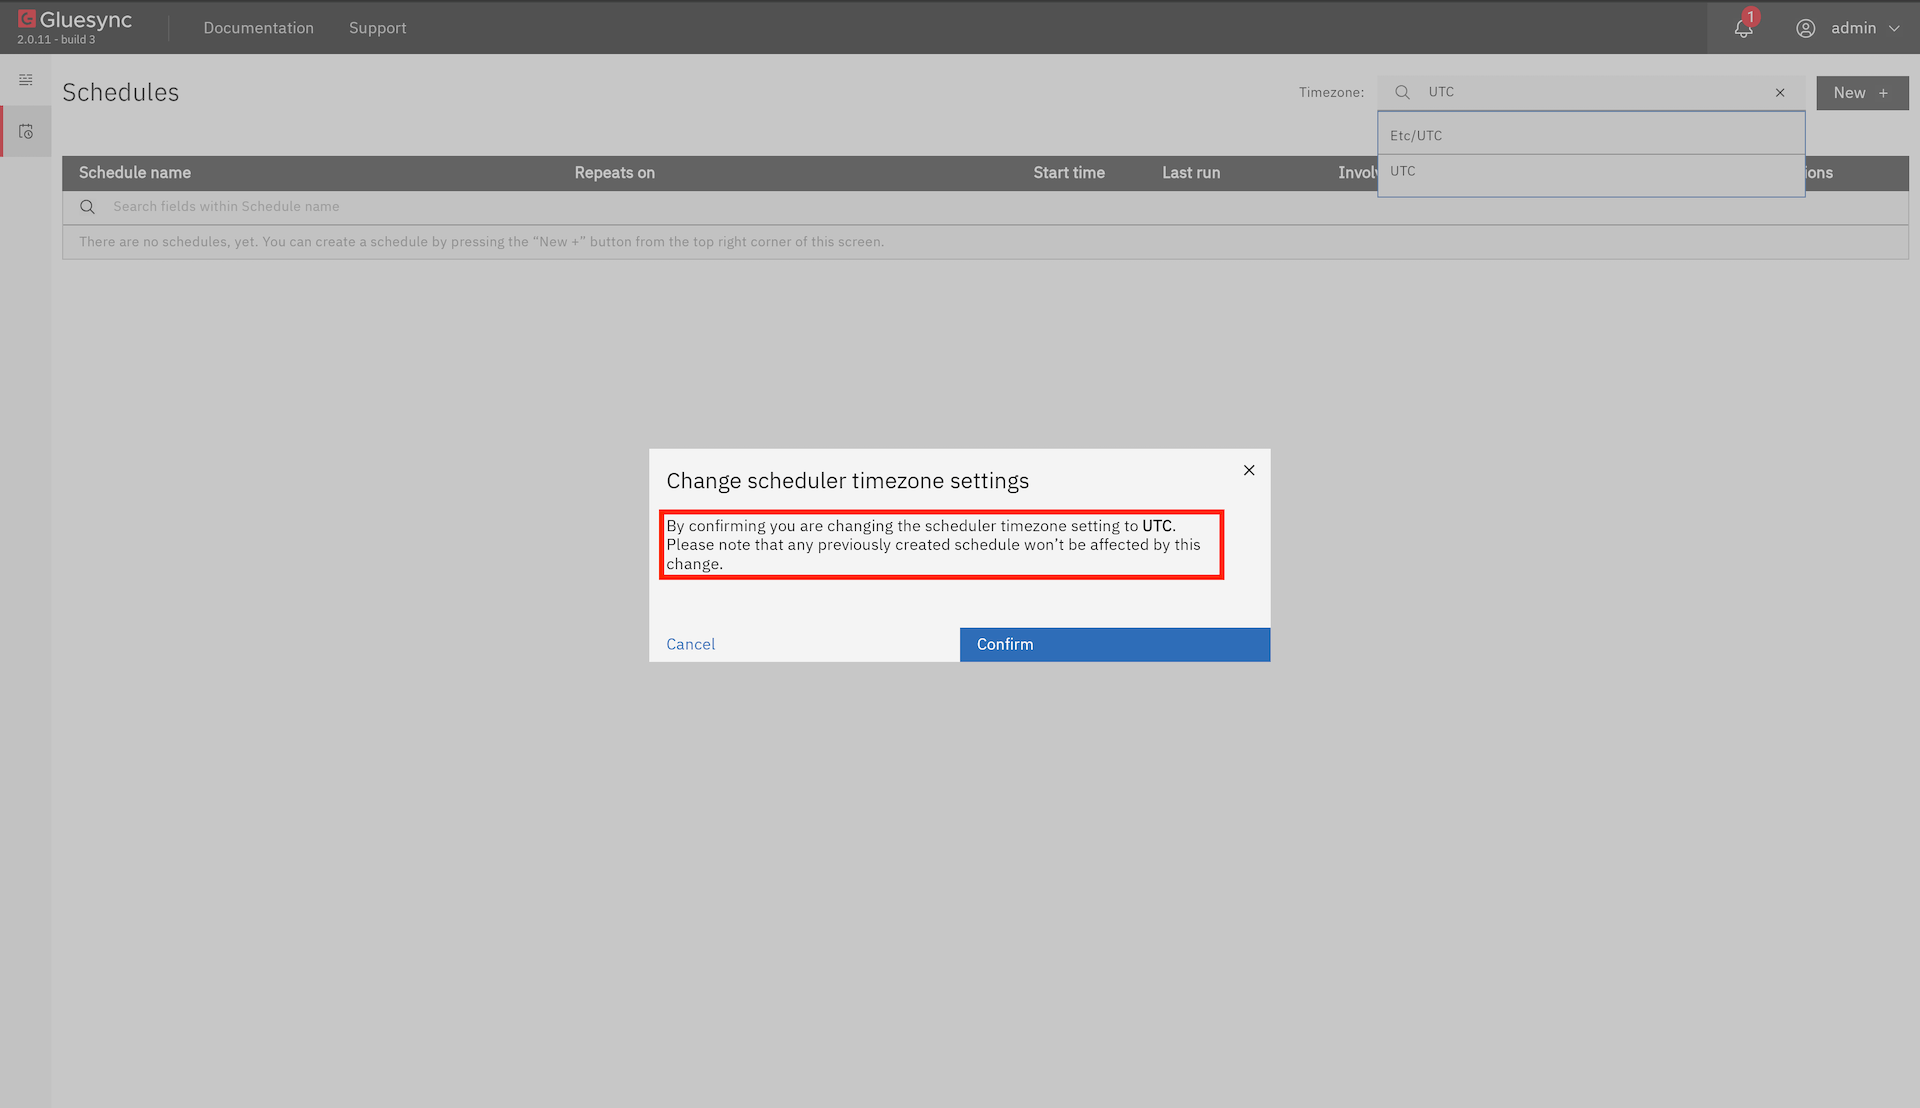
| Before creating a new schedule, ensure you have set your preferred timezone using the timezone selector in the top right corner of the screen. |

Any schedules you create will use the currently selected timezone, and changing the timezone later will not affect existing schedules.
Click the "New +" button in the top right corner

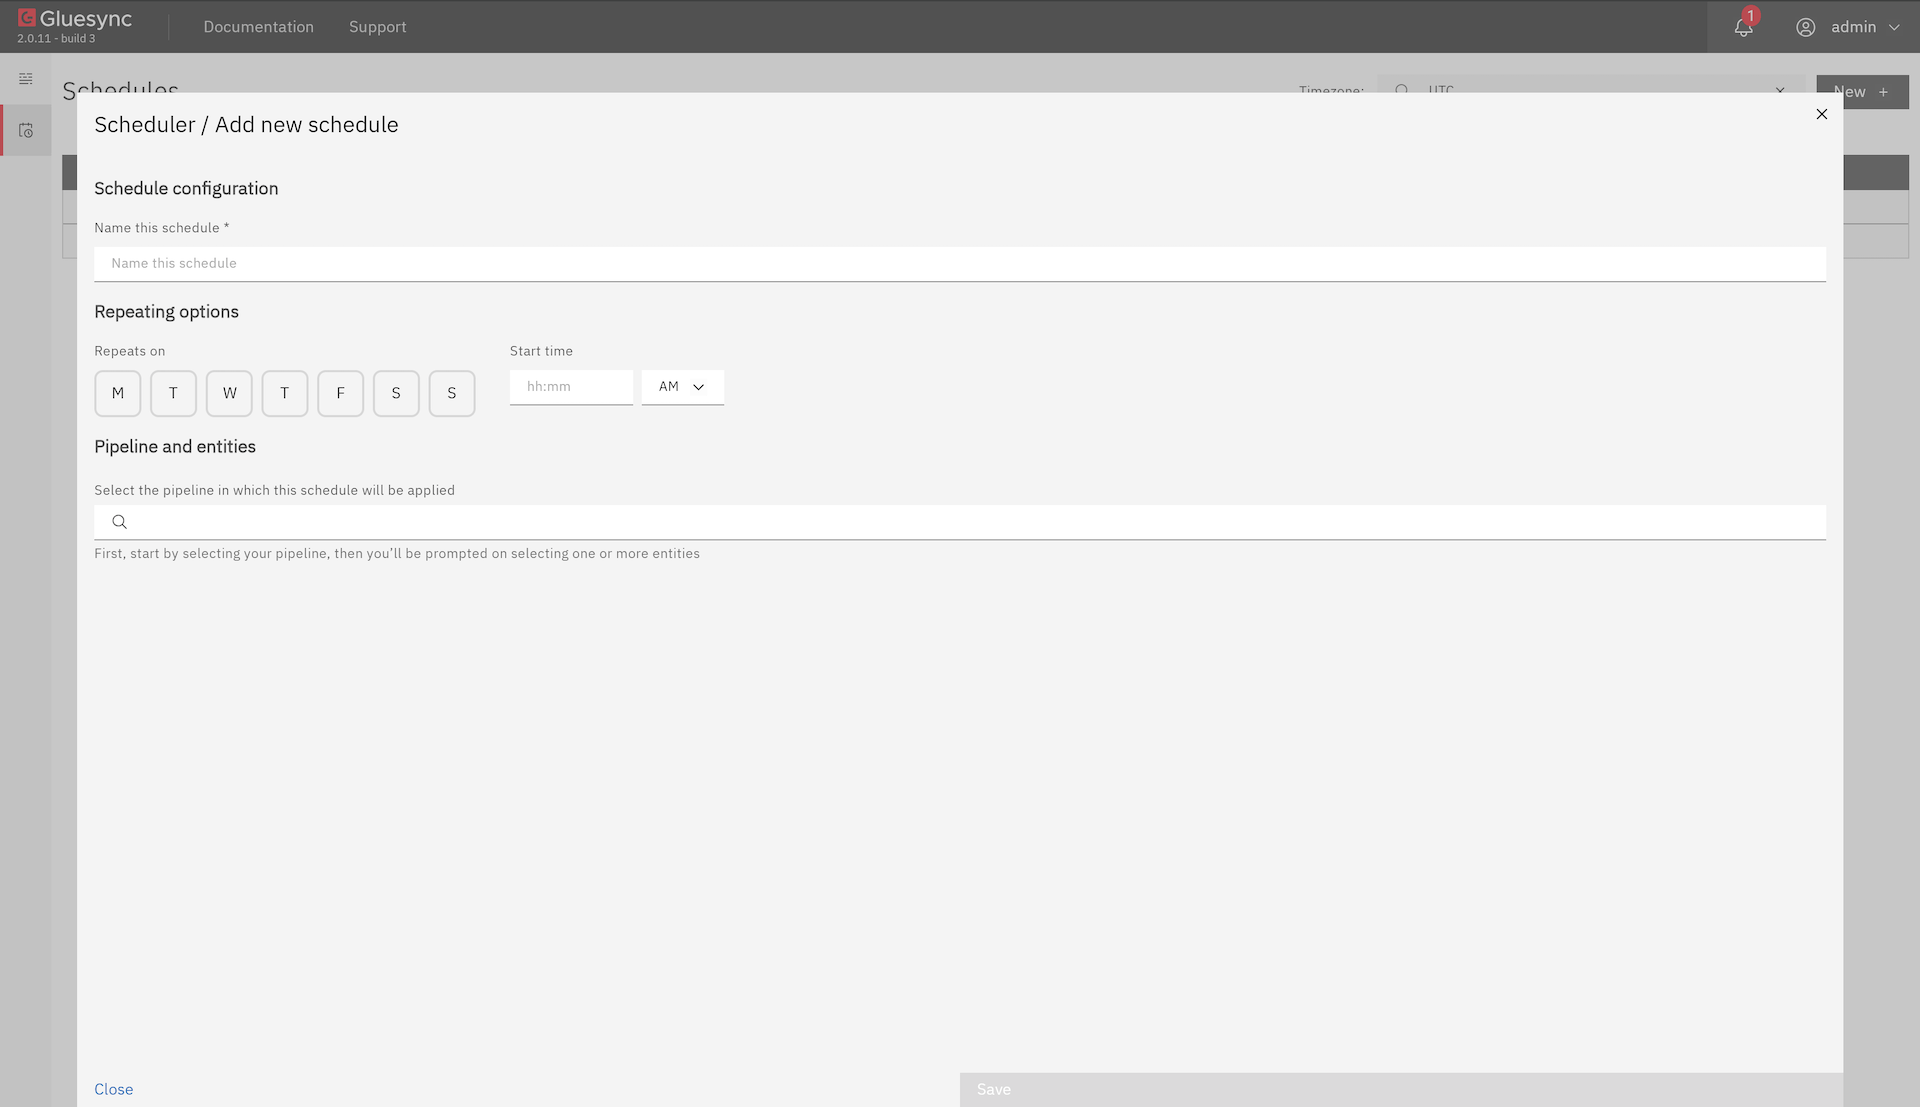
Fill in the schedule details
-
Name: A descriptive name for your schedule
-
Repeating Options: Choose between the repeating options (Days of the week, Hours of the day)
-
Target: Select the specific entity or pipeline to run/pause
-
Action Type: Select the type of action to execute (Run CDC, Pause/Stop, Run Snapshot)
-
Schedule: Configure the schedule using the visual picker and save the schedule
Repeating Options
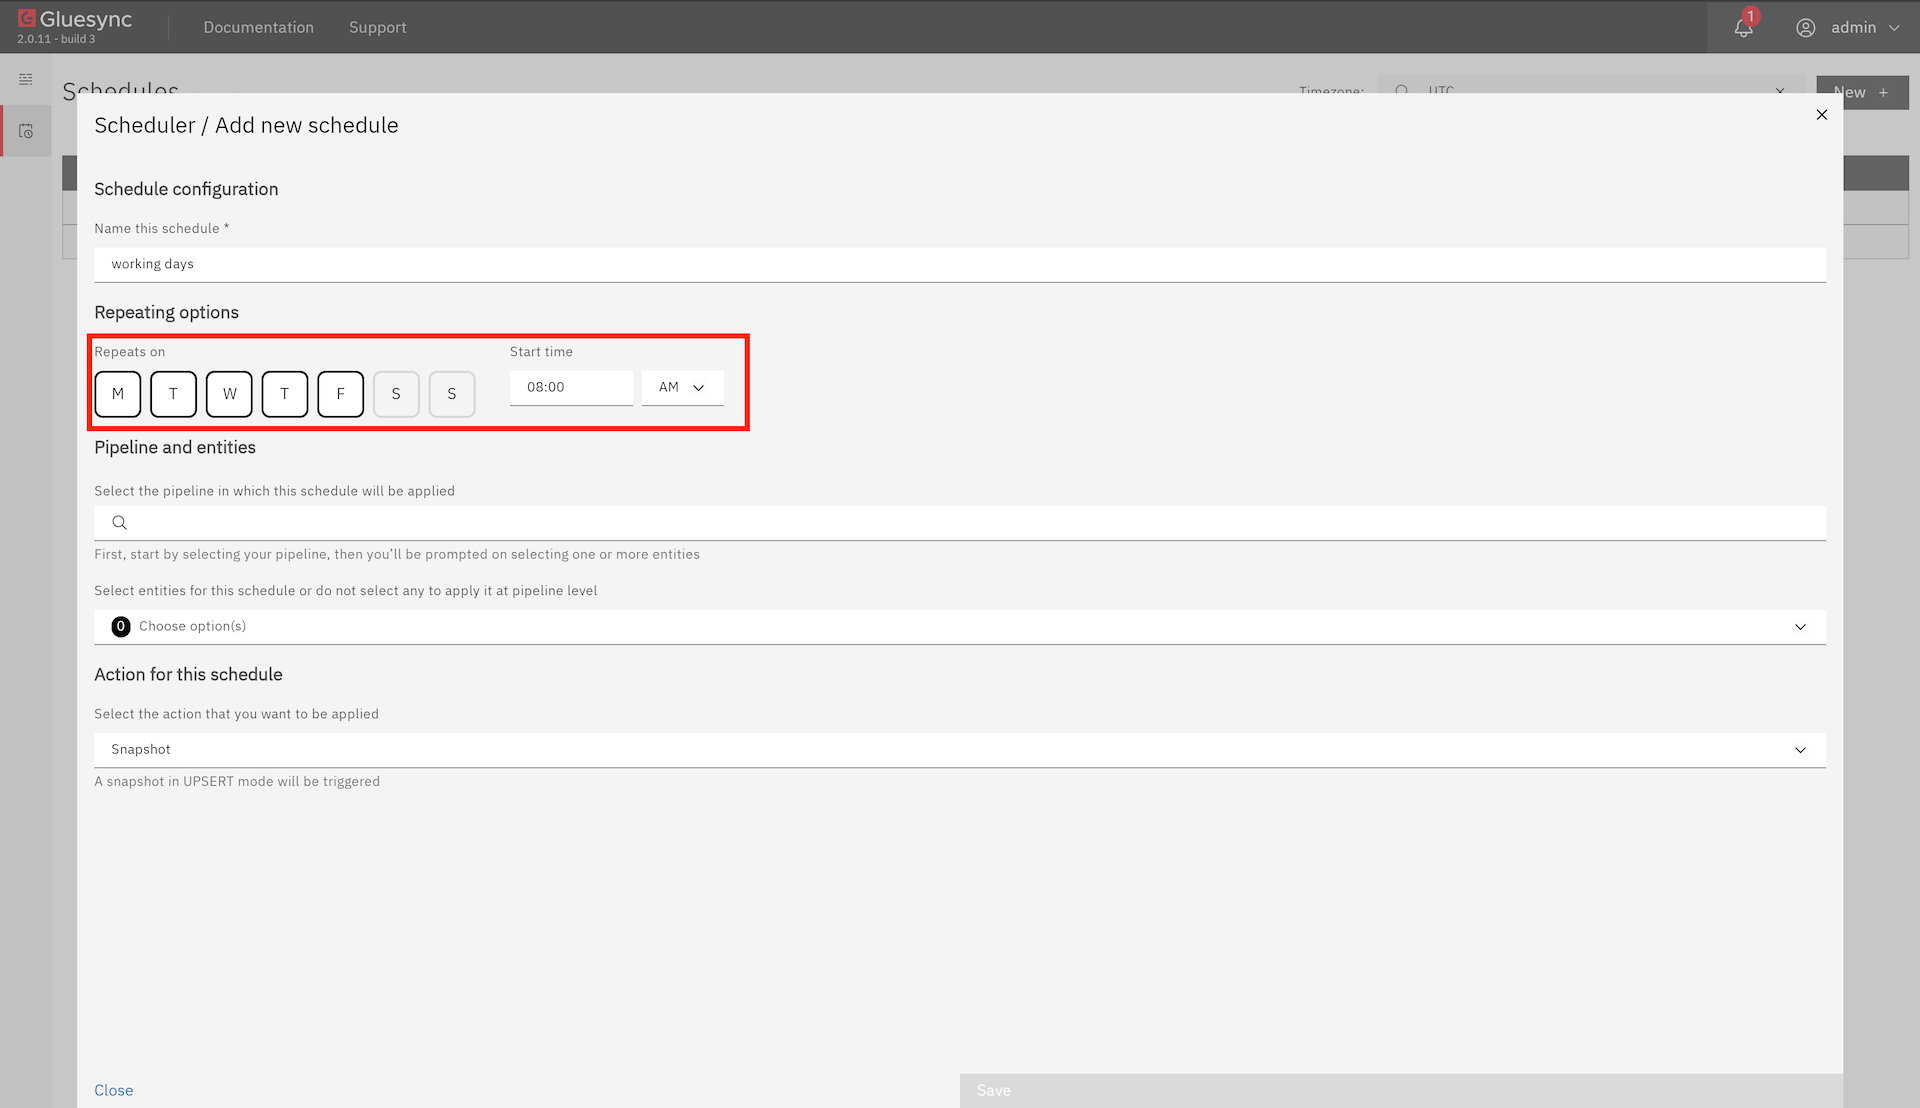
For common scheduling needs, use the simple schedule picker to select from the following options:
Day Selection:
-
A row of checkboxes labeled with day abbreviations (Mon, Tue, Wed, etc.) is displayed
-
Click on each day of the week when you want the task to run
-
Selected days will be highlighted in the interface
Time Configuration:
-
Time input field appears near the day selection
-
Enter the time in 'hh:mm' 12-hour format (e.g., '2:30')
-
Select either 'AM' or 'PM' from the dropdown menu
-
The time picker will validate your input to ensure it’s in the correct format
-
The scheduled time will be based on the timezone you’ve selected in the top right corner
Example Scenarios:
-
For a task that runs every weekday at 9:00 AM:
-
Check Mon, Tue, Wed, Thu, Fri
-
Enter '09:00' in the time field
-
For a task that runs on weekends at 11:30 PM:
-
Check Sat, Sun
-
Enter '11:30' in the time field and select 'PM' in the near field
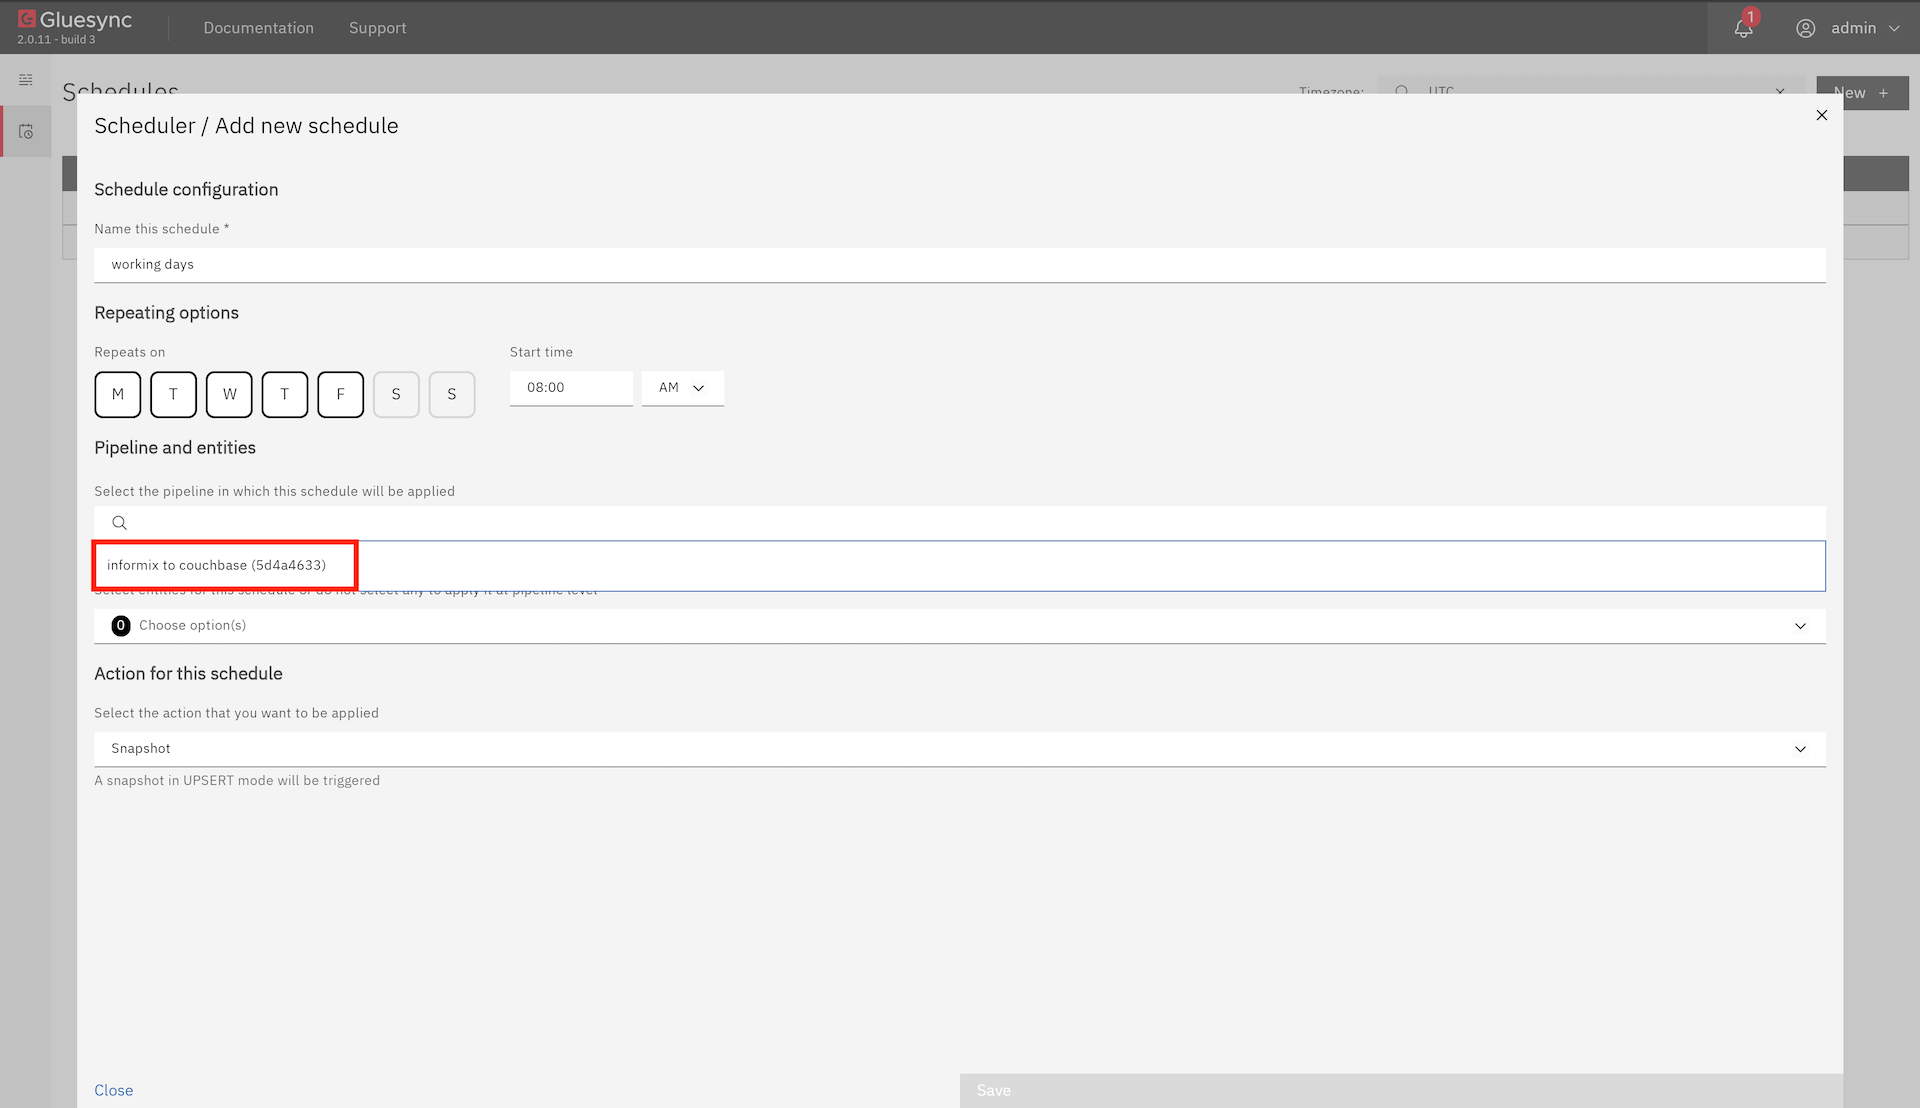
Target Selection
Select a Pipeline
-
Choose the pipeline you want to schedule from the dropdown menu
-
The list shows all available pipelines in your environment
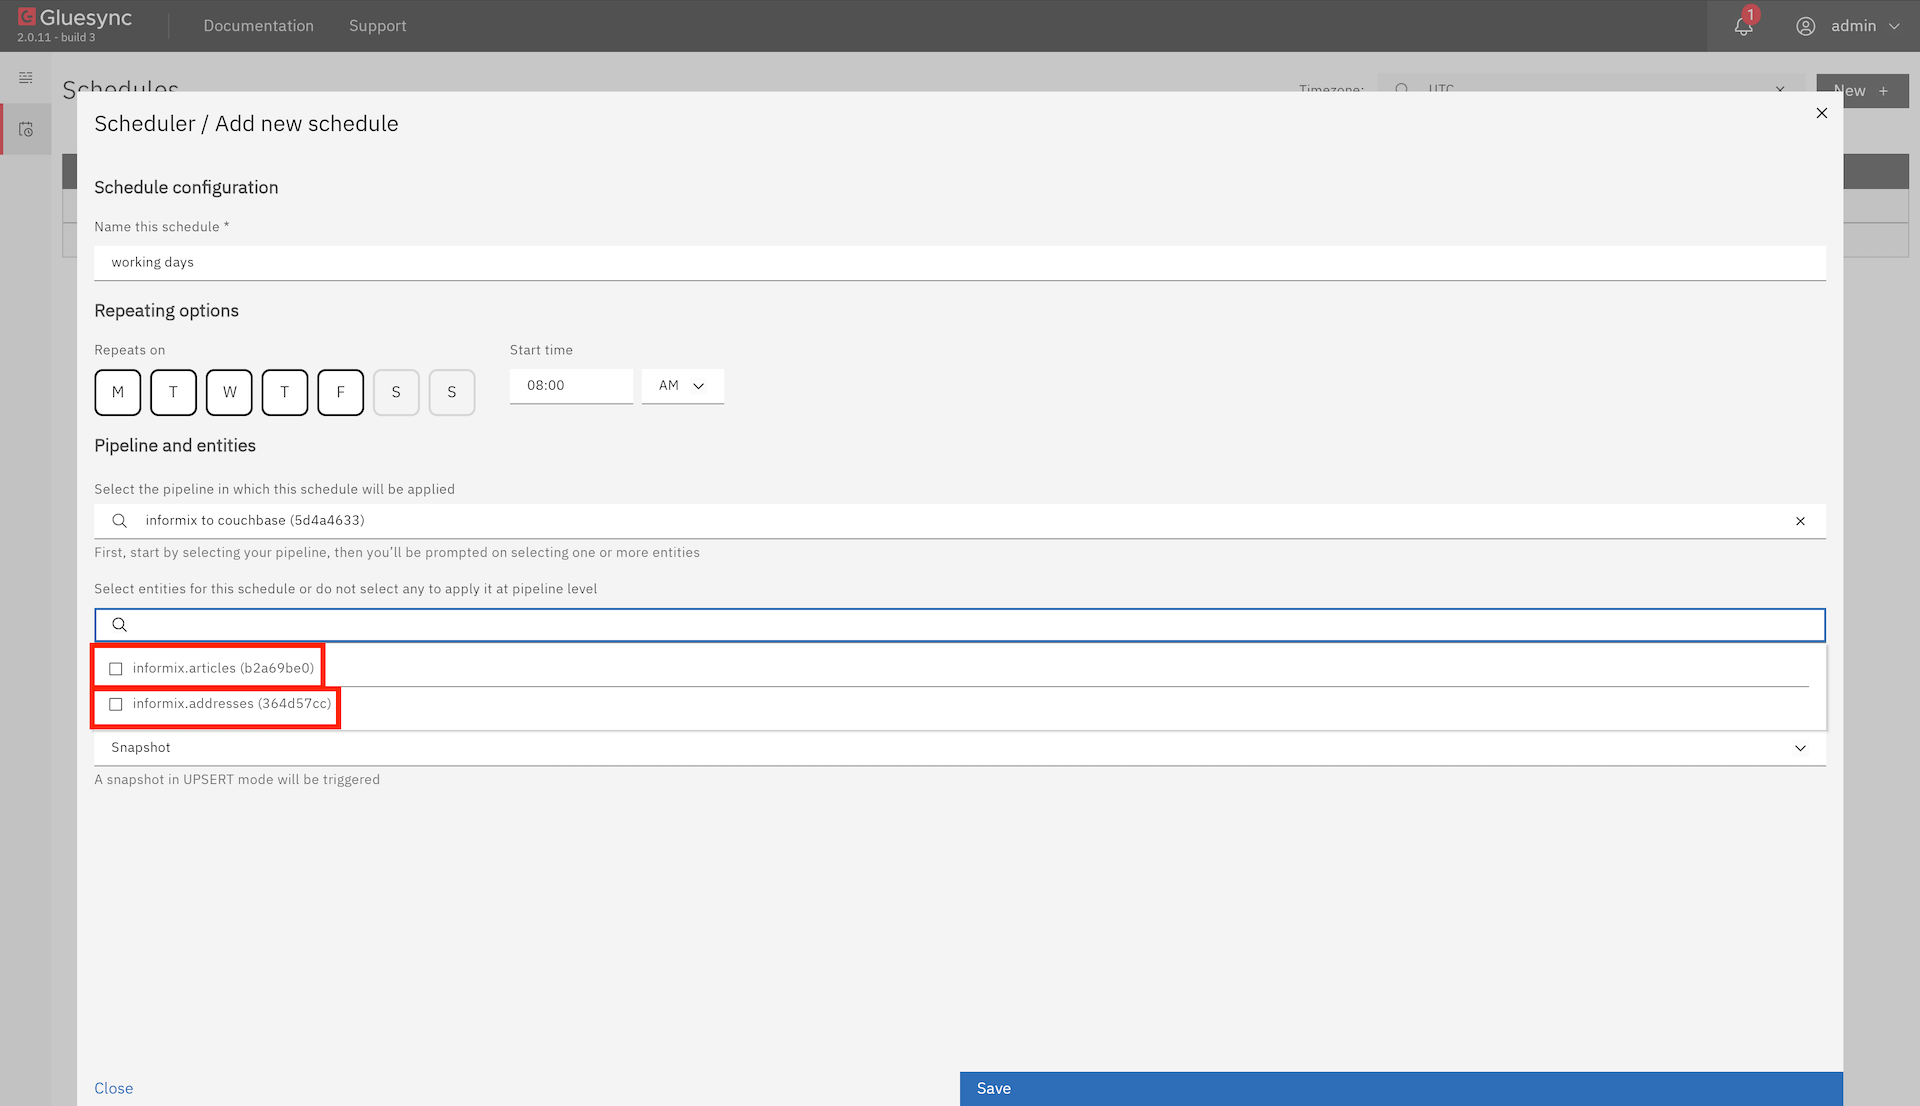
Select Entities (optional)
-
After selecting a pipeline, you can optionally choose specific entities
-
To select entities:
-
Click on the entities dropdown
-
Check the boxes next to the entities you want to include
-
Selected entities will be highlighted
| Leaving all entities unselected will apply the schedule to the entire pipeline. |
Action Types
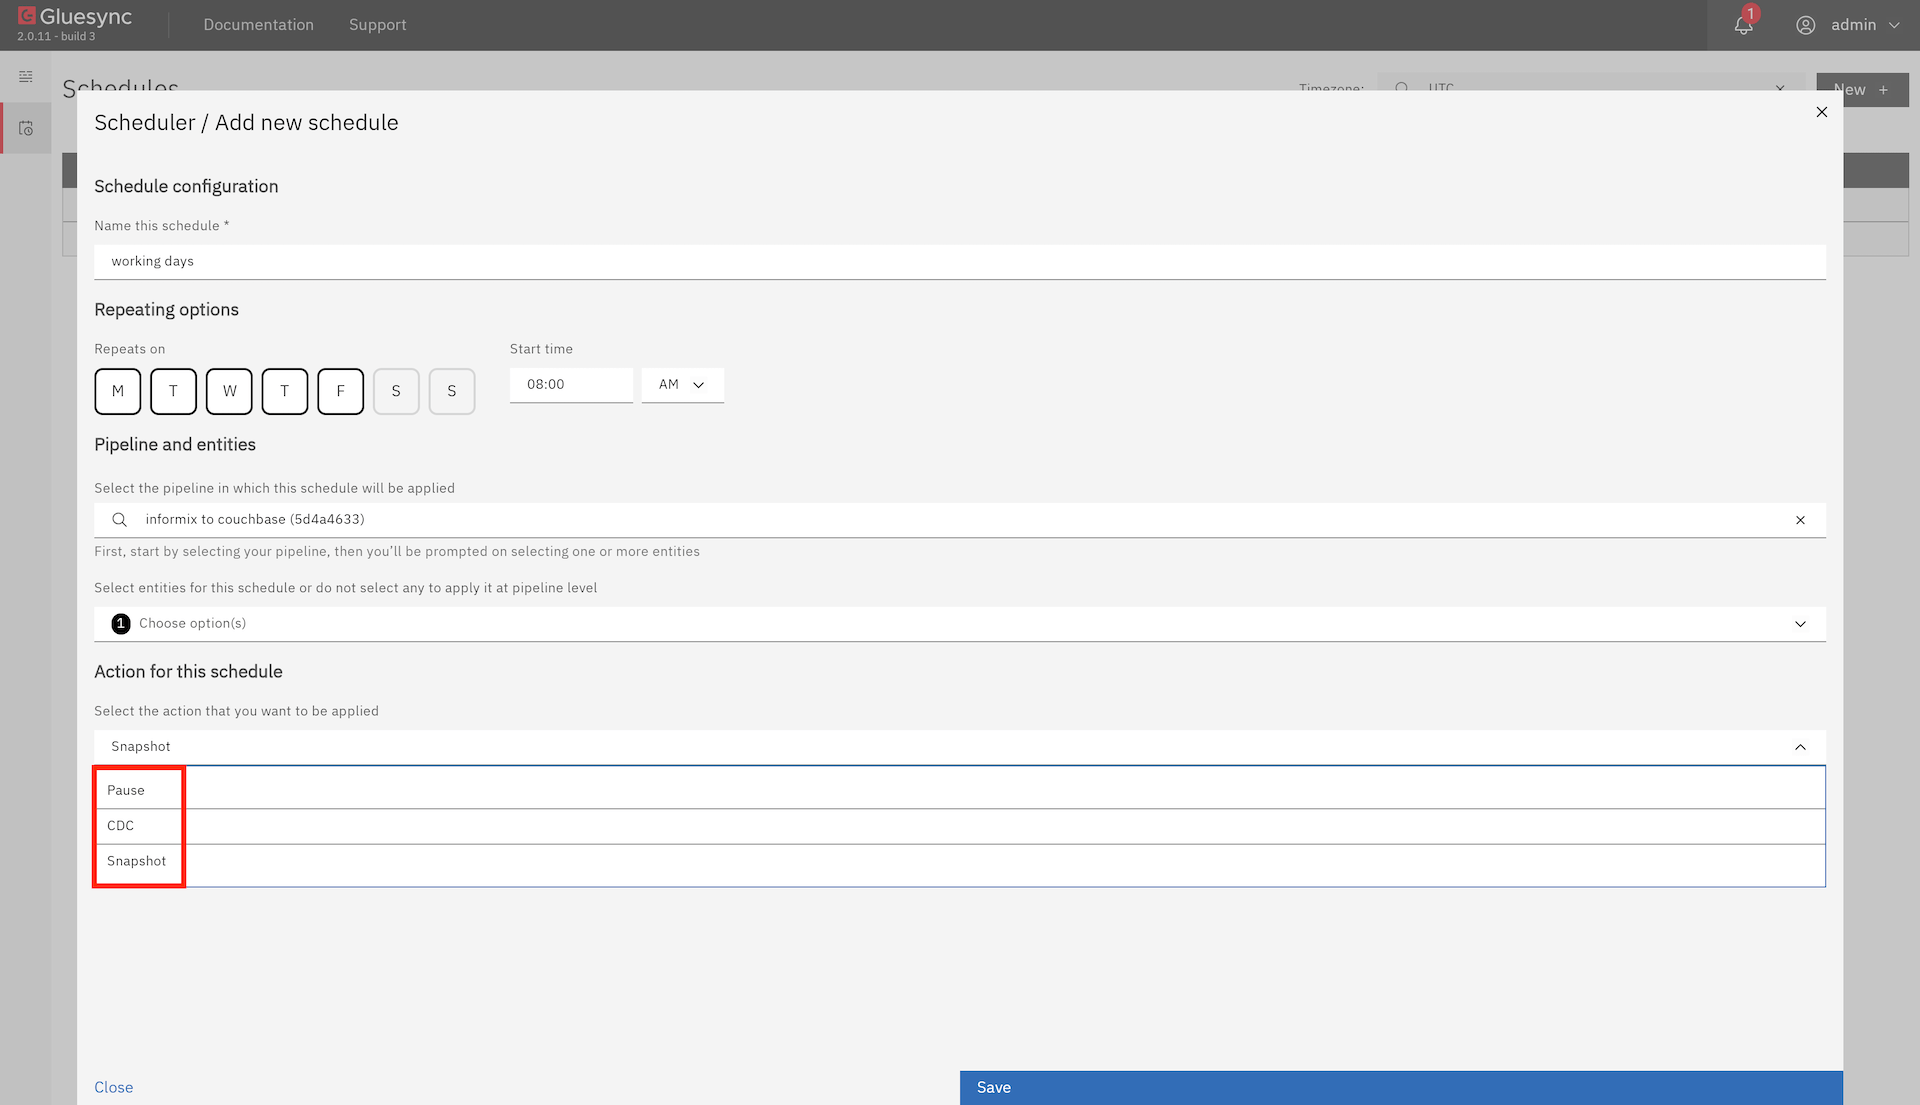
Run CDC
-
Starts the Change Data Capture process with an initial snapshot
-
Performs an initial data load and continues with real-time synchronization
-
Ideal for new entities or when you need to resync data
Managing Schedules


Best Practices
-
Use descriptive names and descriptions for your schedules
-
Test new schedules with a future date before setting them to run immediately
-
Monitor scheduled tasks in the Activity Log
-
Consider timezone differences when scheduling tasks
-
Keep an eye on resource usage for frequently running tasks